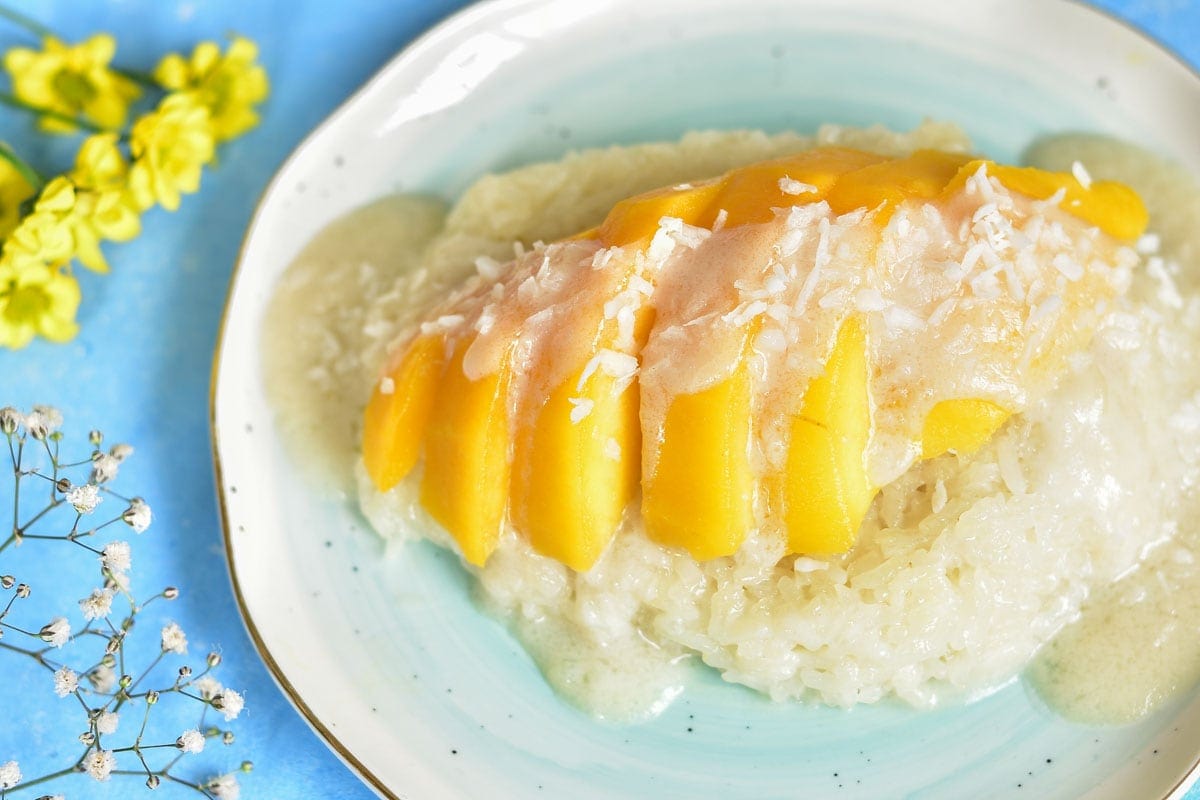
When preparing this dessert I didn’t expect much from it, in the end, it’s just rice, coconut milk, and mango. But when we tried this Thai delicacy, we understood why it’s so popular on the streets of Thailand and in Thai restaurants abroad. Thai coconut sticky rice with mango (Khao Niao Mamuang in the Thai language) is a very simple dessert and requires just a couple of ingredients, but is so delicious. It consists of steamed sticky rice, soaked with coconut milk sweetened with palm sugar. It’s served with juicy and ripe mango, coconut sauce and shredded coconut sprinkled on top.
Ingredients:
Thai glutinous/sticky rice:
Sticky rice is a short-grain rice variety that is very sticky after cooking. It has a really interesting chewy texture, which makes it very delicious.
Sticky rice resembles sushi rice but it’s not the same and this rice should not be used as a substitute.
As an alternative, you can use Jasmine rice and cook it with coconut milk (instructions are also in the recipe card below). The taste will be almost the same, but the texture of the dessert is much different. With this type of rice, this dessert can be prepared faster – Jasmine rice doesn’t need to be soaked in water and steamed but it’s simply cooked with coconut milk.
Thai sticky/glutinous rice is not boiled, but steamed, usually in special basket steamers (they must be lined with gauze or cloth). In Thailand, it’s traditionally steamed in special conical-shaped steamers, which are placed above the fire. If you don’t have a steamer, you can steam the rice simply using two pots and a splash guard / fine-mesh strainer.
Palm sugar:
Palm sugar is often used in South-East Asian cooking. Usually you can buy it in the form of small disks or sometimes in a jar, where is has creamy honey consistency. Palm sugar in blocks needs to be crushed, I usually pound the bag slightly with a meat mallet. It has a wonderful taste – like lemon sugar, delicious, really. You can also use regular ‘white’ granulated sugar (which is also more commonly used for this recipe), but for me sticky rice tastes so much better sweetened with palm sugar.
Thai coconut sticky rice with mango can be eaten as a dessert (I‘ve found recipes, which call for ½ cup of rice and ½ cup of sugar!) or for breakfast/lunch/as a light dessert- like my recipe, as it’s not overly sweet. Feel free to use more sugar if you wish, though.
Mango:
This is the most important ingredient of this recipe, so make sure it’s ripe and sweet.
My favorite mango variety is mango Ataulfo or Alphonso (Mexican, Indian or Thai mangos) or Honey mango (this variety is showed on the photos). They are super sweet, juicy, and not fibrous. Try these mangos if you can find them in your grocery store / Asian stores / healthy food stores.
Instead of mango, you can also use fresh and ripe pineapple. Yes, it’s also delicious with the pineapple!
Coconut milk:
I used regular canned full-fat coconut milk. Low-fat coconut milk can also be used bu the dish will be less tasty. Make sure that you buy coconut milk, that lists only 2 ingredients: coconut and water (or coconut cream and water) with no stabilizers added. For this recipe, you need to shake with the can before opening it so that the thick and thin part of coconut milk (coconut cream and coconut water) and thoroughly combined. If you forgot to do that just stir these two parts with a spoon.
How to make sticky rice with mango step by step:
We’re starting with cooking the sticky rice.
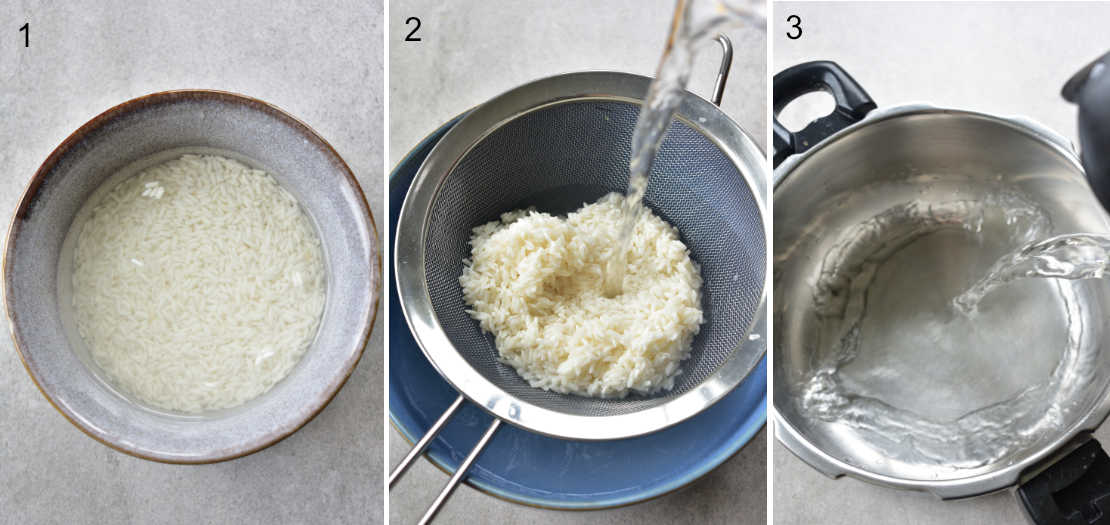
STEP 1: Soak the rice – add enough water to cover 3/4 cup of sticky rice and leave for 2 hours or longer, max. overnight.
STEP 2: Rinse the rice with cold water.
STEP 3: Steam the rice. You can use a steamer if you have one or if not, this simple method, showed on the photos. You will only need 2 large pots and a splash guard / fine-mesh strainer. Start with adding boiling water to the pot.
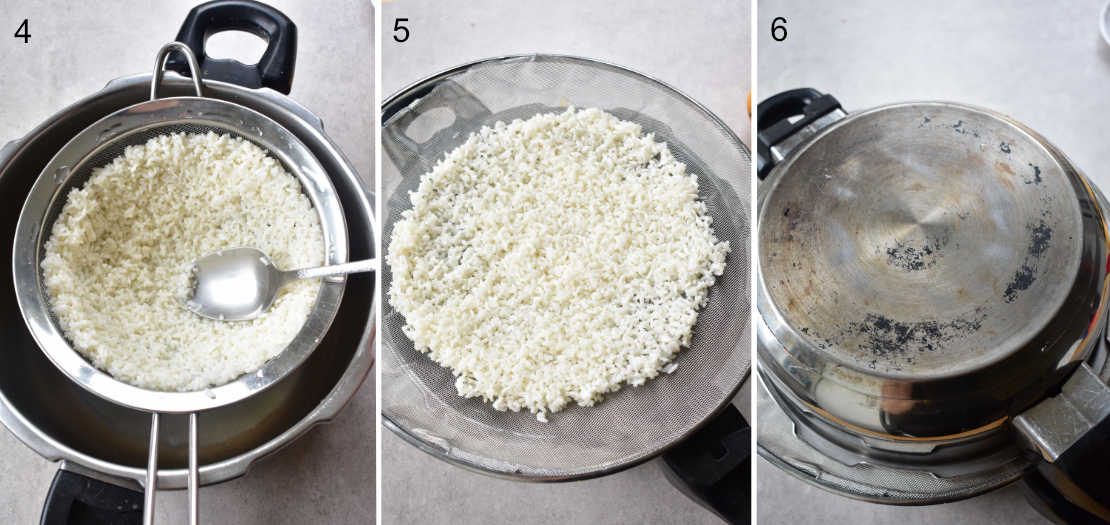
STEP 4 + 5: Place a fine-mesh strainer or a splash guard over the pot. If you’re using a fine-mesh strainer, which is oval, you need to press the rice to the sides of the strainer, so that there’s an evenly-thick layer of rice on every side of the strainer (if you won’t do that the rice in the middle won’t be cooked). If you’re using a splash guard, which is flat, just lay the rice in an even layer on the splash guard.
STEP 6: Cover the fine-mesh strainer / splash guard with a second pot. Steam for about 20 minutes or until the rice is soft (but it should have a slight bite to it in the middle of the grains).
Now we soak the rice with sweetened coconut milk:
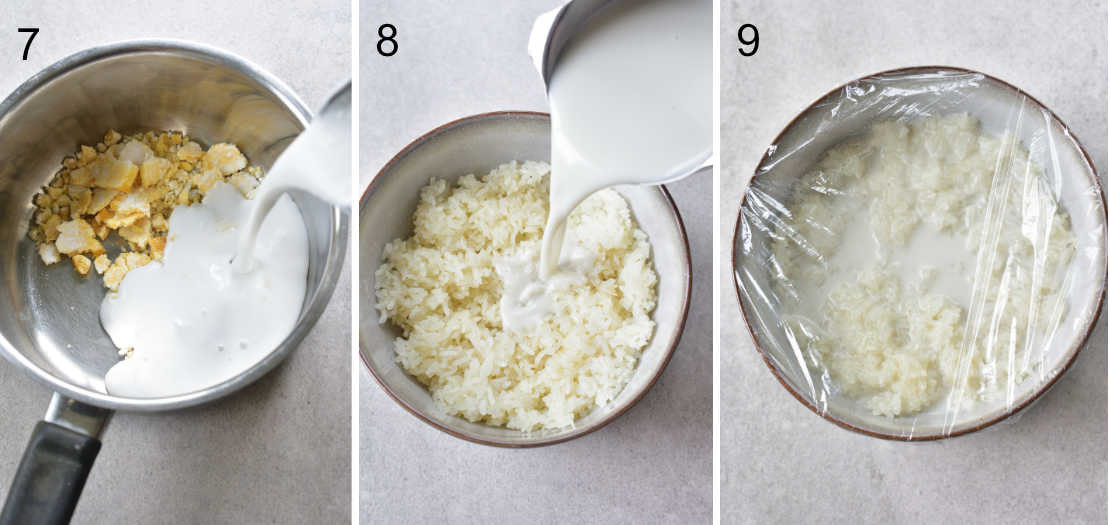
STEP 7: Crush 1/2 oz (35g, this is about 3/4 disk of palm sugar) palm sugar into smaller pieces (I add the sugar to a zip lock bag and pound it with a meat mallet), add it to a pot, along with 1 and 1/4 cups of coconut milk from the can and a pinch of salt. Make sure to shake with the pan before opening it so that the thick and thin parts of coconut milk are combined.
STEP 8: Heat the milk over medium-low heat until the palm sugar is dissolved. Add the steamed rice to a medium bowl, even out its surface with a spoon. Add 3/4 of the milk to the rice, leaving 1/2 cup in the pot. Cover the bowl with rice and set aside for 20-30 minutes or until rice absorbs all the milk.
Make the coconut sauce:
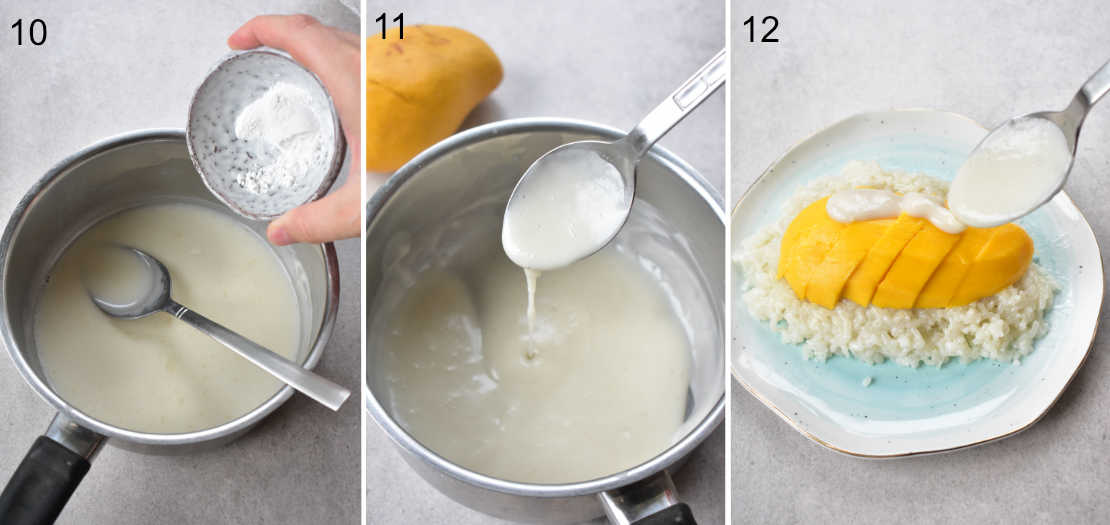
STEP 10: Add 1.5 ts of rice flour to the remaining coconut milk.
STEP 11: Cook for about 2 minutes just until the sauce is thickened.
STEP 12: Assemble the dish: Place the rice on the plates, top with sliced mango, and pour over the coconut sauce. Sprinkle with shredded coconut.
Enjoy!
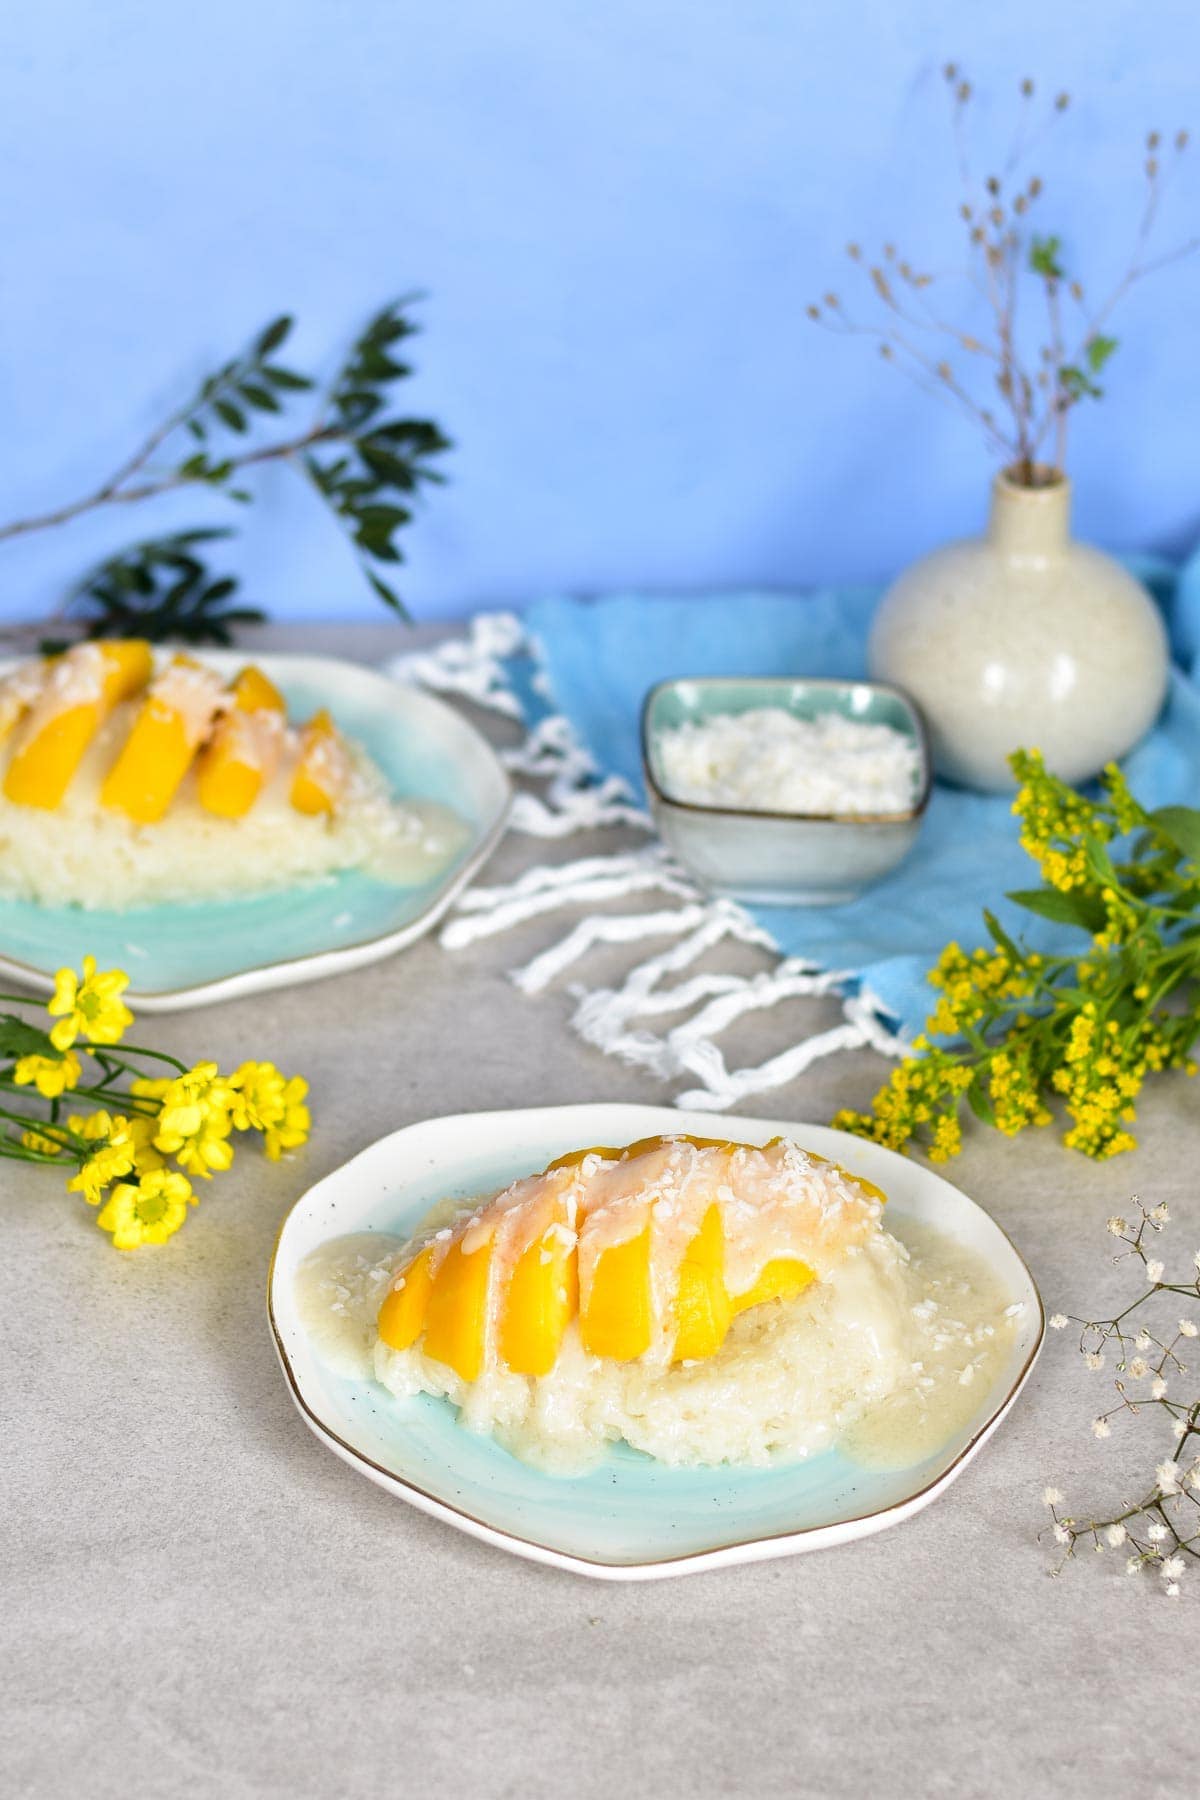
Note about the photos: Thai coconut sticky rice on the main photos (this photo above and the first photo of the post) was prepared from 1 cup of rice, but I found it a bit too much, so from the recipe below you will have a little less rice than on the photos. The amounts shown on the step-by-step photos are accurate.
If you love Thai cuisine as much as we do, make sure to also check out my Thai red curry with shrimp and spinach recipe! You can also use leftover coconut milk to make Pina Colada.
Thai coconut sticky rice with mango
Ingredients
when using Thai sticky rice:
- 3/4 cup Thai sticky/glutinous rice 5.7 oz / 160g
- 1 ¼ cup coconut milk from a can
- 1.2 oz (35g) palm sugar (3/4 of a 3-inch round disk) or 2.5 Tbsp of granulated sugar
- pinch of salt
- 1.5 teaspoons rice flour or 1 ts cornstarch
- 1 large ripe mango or fresh and ripe pineapple
- shredded coconut for sprinkling
when using jasmine rice:
- ½ cup jasmine rice about 3.5 oz / 100g
- 1 cup boiling water
- 1 cup coconut milk from a can
- 1.2 oz (35g) palm sugar (3/4 of a 3-inch round disk) or 2.5 Tbsp of granulated sugar
- a large pinch of salt
- 1 teaspoon rice flour or 1 ts cornstarch
- 1 large ripe mango or fresh and ripe pineapple
- shredded coconut for sprinkling
Would you like to save this?
Instructions
Method, when using Thai glutinous rice:
- Prepare the rice:Soak the rice for 2 hours or longer, for a couple of hours or overnight.
- Rinse the soaked rice with water.
- Steam the rice for about 20 minutes, it’s ready when it’s soft and translucent, but should have just a slight bite to it.
- How to steam the rice:Use a steamer or this simple method requiring 2 large pots and a fine-mesh strainer or a splash guard. Pour boiling water into a large pot, put a splash guard or a fine mesh-strainer on top (it shouldn’t touch the water surface). Place the soaked rice on it, in an even layer, cover with a second pot or a lid (large enough to cover the rice without touching it). Fine mesh strainer will only work with small amounts of rice, you need to make a hollow in the rice portion, its layer should have an even thickness on every side of the strainer (or the rice won‘t cook evenly). Cook over medium heat until soft. Larger amounts of rice, e.g. 2 cups, should be stirred once during steaming. If you're using a splash guard, just place the rice in an even layer on it.
- Soak the rice in coconut milk: Transfer the rice into a medium bowl, smooth its surface with the back of a spoon.
- If you're using palm sugar in blocks, you need to crush it into smaller pieces. Put the 1 block of sugar in a zip lock bag and pound it with a meat mallet. You will need a 3/4 of one, 3-inch (7cm) block for this recipe, you can also add more if you wish.
- After opening the coconut milk can, mix thoroughly its content – thick and thin part. Pour coconut milk into a small pot (1 and ¼ cup), add sugar and salt, cook over medium heat (but don’t let it boil) until the sugar dissolves.
- Add ¾ cup coconut milk with sugar to the rice, leave ½ cup in the pot.
- Cover the bowl with plastic foil, let stand for 30 minutes, or until the rice absorbs the liquid.
- Make the coconut sauce: add the rice flour to the remaining coconut milk in the pot, cook on medium heat for a couple of minutes, until thickened.
- Prepare the mango: peel, remove the pit and cut into slices.
- Serve: place a portion of rice on a small plate, then mango slices on top, pour the coconut sauce over and sprinkle with shredded coconut. Serve warm.
Method, when using jasmine rice:
- Cook the rice: Rinse the rice, add to a small pot, add a pinch of salt, pour 1 cup of boiling water, cover, bring to a boil, reduce the heat to a minimum and cook for about 15 minutes or until the water is absorbed and the rice is soft.
- After opening the coconut milk can, mix thoroughly its content – thick and thin part.
- Pour 1 cup of coconut milk into a small pot, add sugar, a pinch of salt and cook over medium heat until the sugar is dissolved, remove from the heat.
- Pour ¾ cup of milk with sugar over the rice, mix together, leave for about 10 minutes, until most of the milk is absorbed. The rest of the milk stays in the pot.
- Coconut sauce: add 1 teaspoon of rice flour to the remaining 1/4 cup of milk in the pot, cook for a couple of minutes, stirring, until thickened.
- Prepare the mango: peel, remove the pit and cut into slices.
- Serve: place a portion of rice on a small plate, then mango slices on top, pour the coconut sauce over and sprinkle with shredded coconut. Serve warm.
- Enjoy!
Notes
- Calories = 1/2 of the recipe (1 serving).
- 1 cup is 240-250 ml
Did you make this recipe? RATE THE RECIPE or tell me in the COMMENTS how you liked it! You can also add a photo of your dish. It would make me very happy and will help other readers. Thank you!!


No Comments