These Halloween spider cookies are not only fun and cute but also really delicious. Soft peanut butter cookies are topped with Reese’s peanut butter cups and decorated with candy eyes and chocolate to resemble spiders. Your kids will be thrilled with these peanut butter chocolate treats!

Ingredients
Here’s what you need to make this easy recipe:
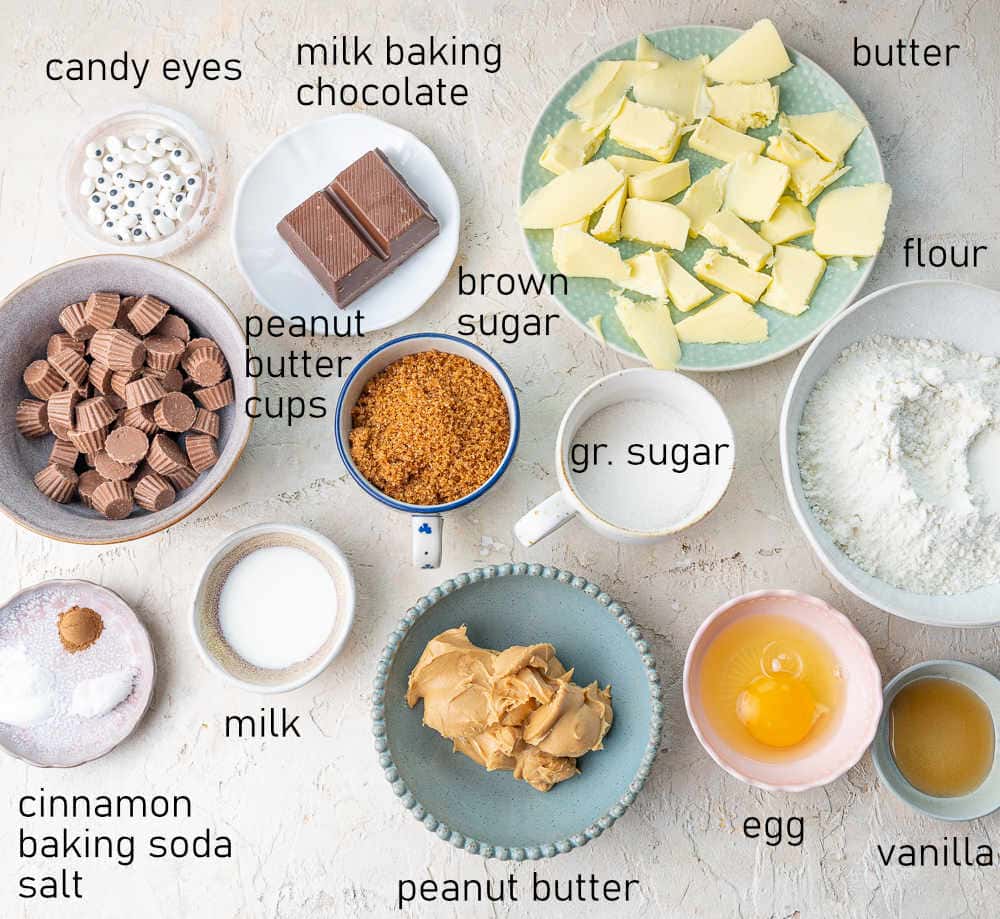
- Peanut butter cookie dough – this recipe is a modified version of these chocolate chunk peanut butter cookies.
- Peanut butter – I used really thick peanut butter, if yours is rather runny (natural peanut butter), omit the milk.
- Peanut butter cups – I used Reese’s Minis unwrapped but you can also use regular Reese’s miniature peanut butter cups (they are a little bit bigger than Minis unwrapped). Alternatively, you can use Lindt Lindor candy truffles but I prefer smaller candy so that you can eat more cookies 😉
- Candy eyes – they look really adorable. Alternatively, you could pipe some melted white and milk chocolate as ‘eyes’.
- Chocolate – I used baking milk chocolate – it’s already tempered – it’s a technique that allows the chocolate to keep its color and prevents it from turning grey. You can also use chocolate chips but I prefer chocolate bars for their better flavor. If using regular chocolate bars, plan on eating these treats quickly.
These cookies are also really good alone, minus the spider part. If you’d like to make them with chocolate, it’s better to use this recipe for chocolate chunk peanut butter cookies. Another option is to make the recipe below and just dip the cookies in melted chocolate or make a spiderweb design on top.
If you’d like to make these cookies without peanut butter, you could make these delicious cut-out sugar cookies.
How to make spider cookies step by step
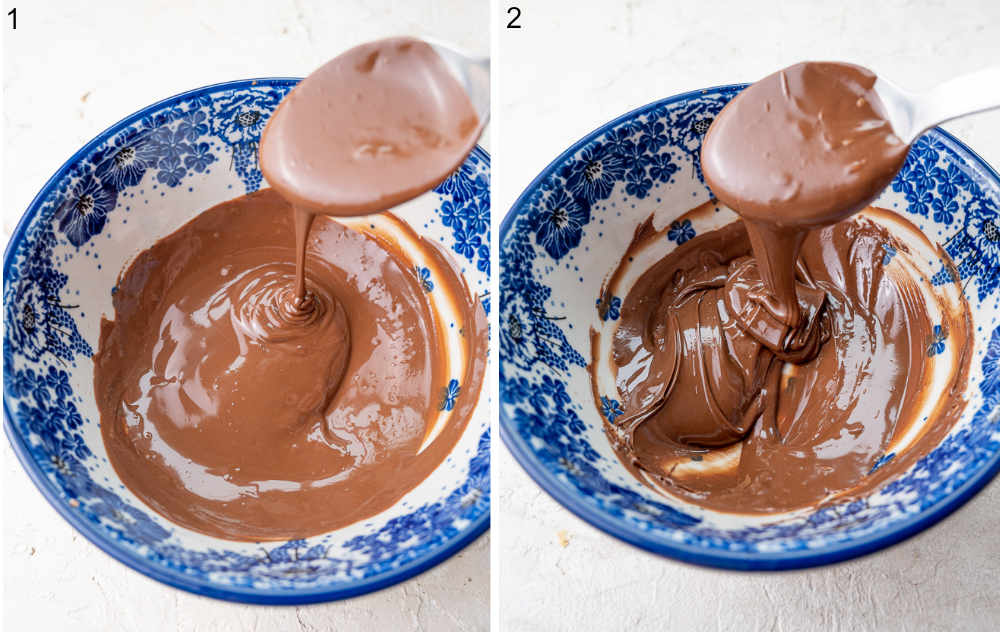
STEP 1+2: Start with melting the chocolate: chop the chocolate into small pieces and place in a heat-proof bowl. Place the bowl on a small pot filled with boiling water. Let stand for a minute then stir until the chocolate is melted. Set aside to thicken a bit (you can put it in the fridge for 5-10 minutes). The chocolate should still be pourable but not as runny as just melted (it will be easier to pipe).
The left photo shows runny melted chocolate and the photo on the right melted chocolate that has cooled and thickened a bit – this is what you should aim for.
Place Reese’s peanut butter cups in the fridge (unwrapped).
Preheat the oven to 350°F (180°C).
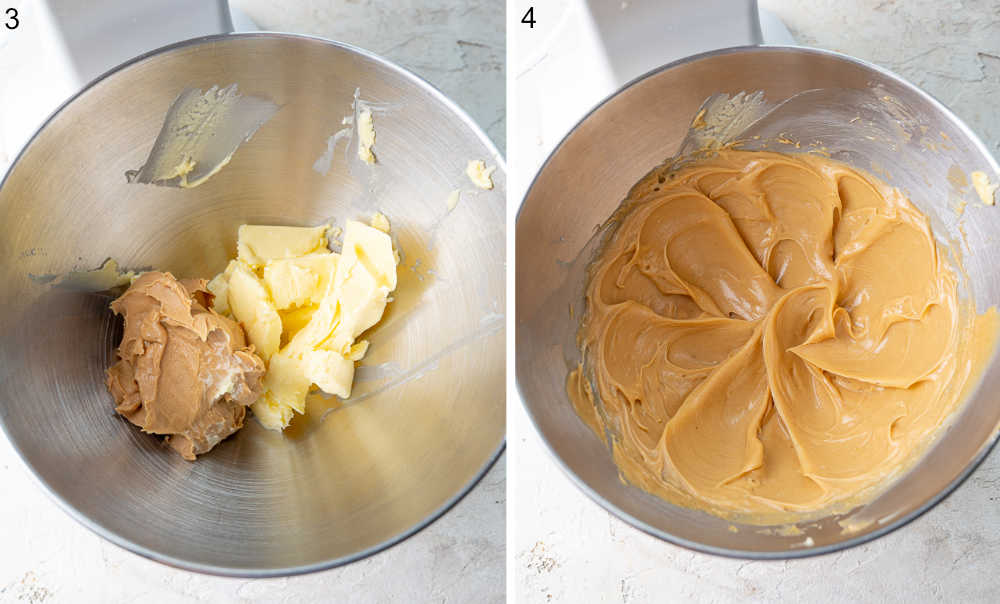
STEP 3+4: Add soft butter and room temperature peanut butter to a mixing bowl. Mix with a hand mixer or a stand mixer fitted with a paddle attachment for about 1-2 minutes or until smooth (scrape the sides of the bowl with a spatula if needed).
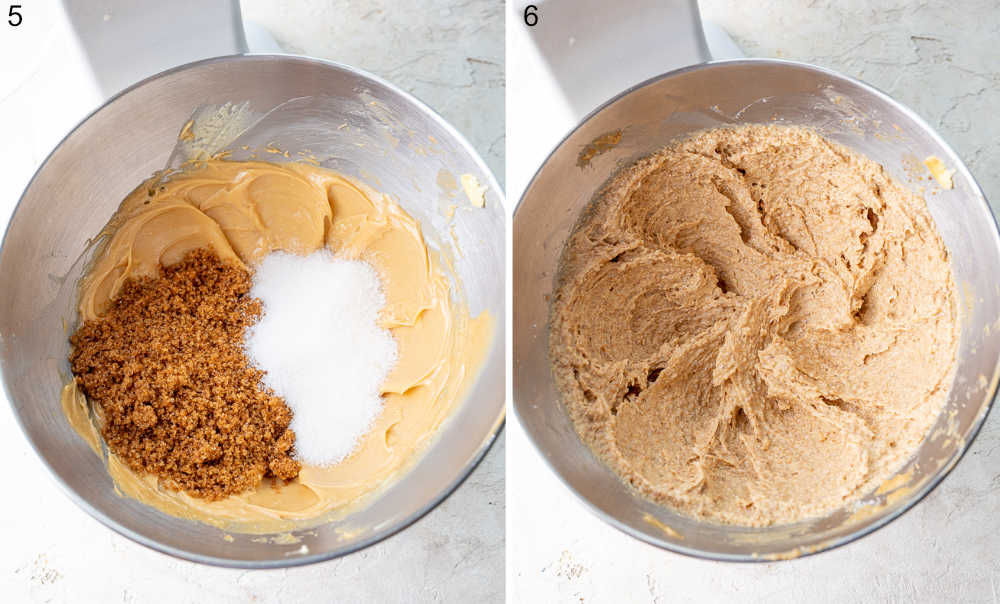
STEP 5+6: Add both types of sugar and mix for a further 2-3 minutes or until well-combined and paler in color.
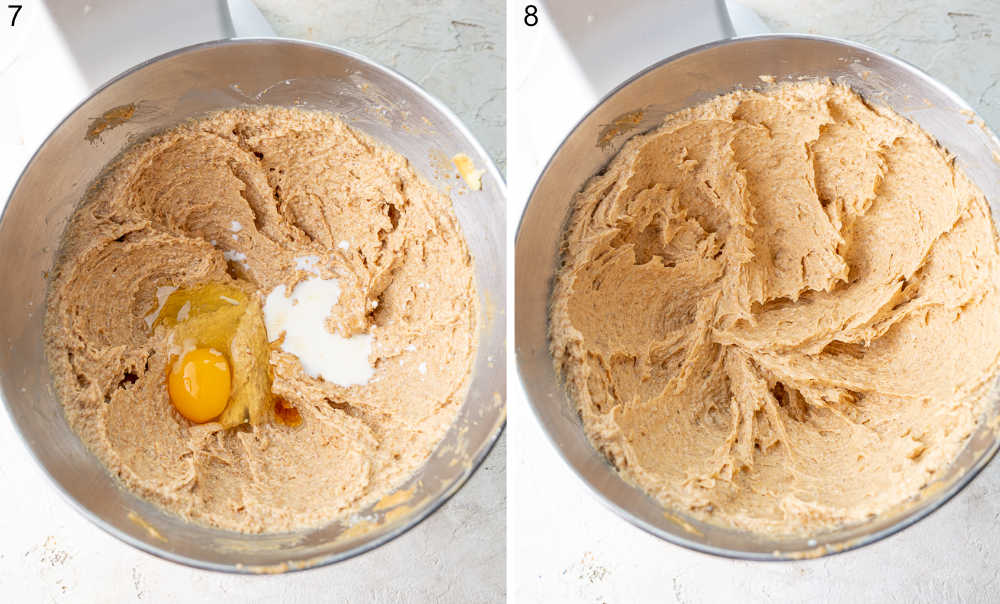
STEP 7+8: Add egg, vanilla, and milk. Mix for a minute or until well-combined.
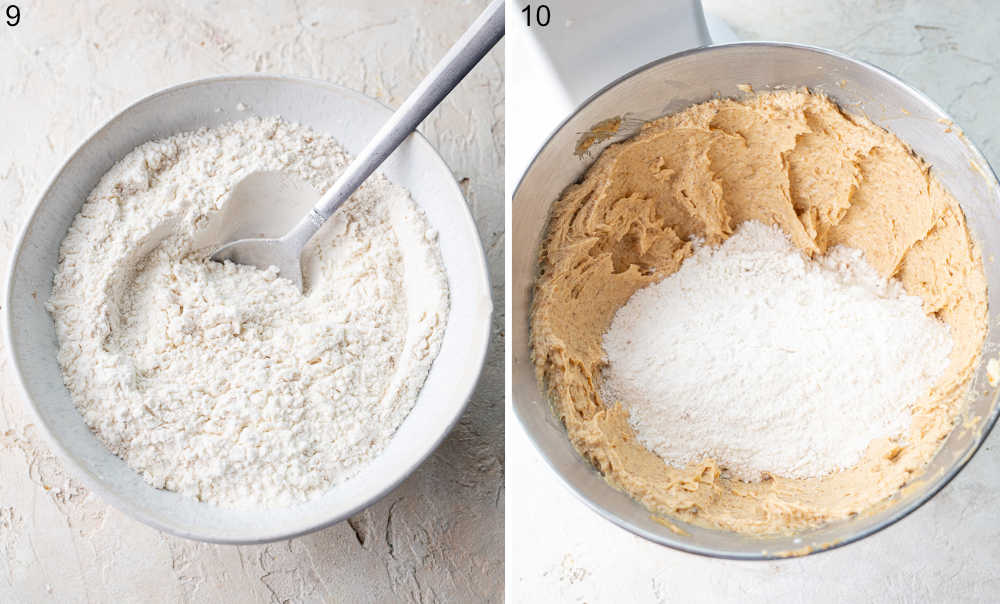
STEP 9: In a medium bowl, whisk together flour, salt, cinnamon, and baking powder.
Would you like to save this?
TIP: How to measure flour: Fluff the flour by stirring it in the bag/flour container with a spoon. Spoon the flour and sprinkle it into your measuring cup. Sweep off the excess flour with the back of a knife. Use a digital scale for best and consistent results.
STEP 10: Add the flour mixture to the mixing bowl. Mix at low speed until almost combined.
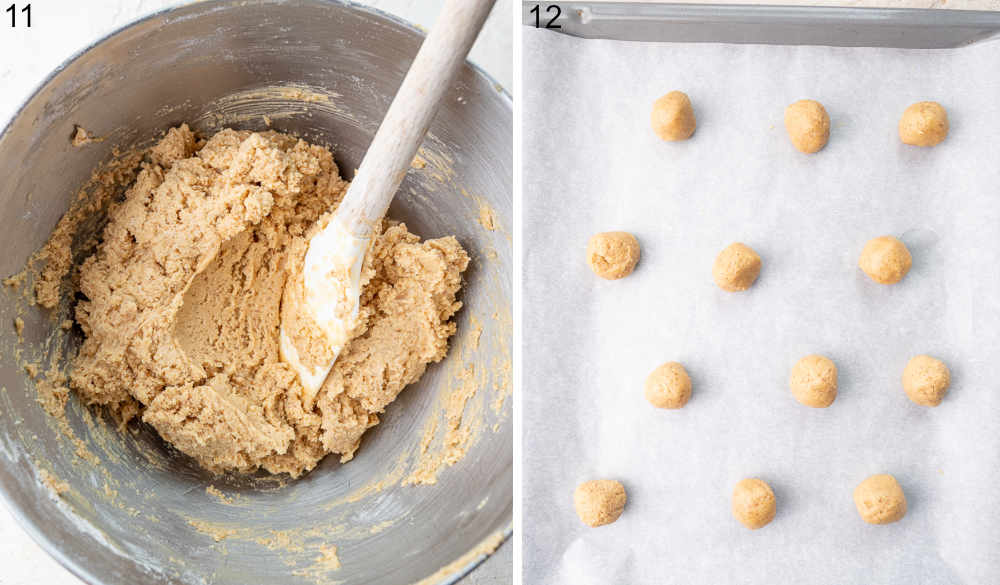
STEP 11: Stir the mixture with a spatula until combined. Don’t stir it for too long, just until combined and you see no white streaks of flour.
STEP 12: Prepare 3 baking sheets lined with parchment paper.
Roll the cookie dough into 1-inch (2-3 cm) balls and place apart on the baking sheet.
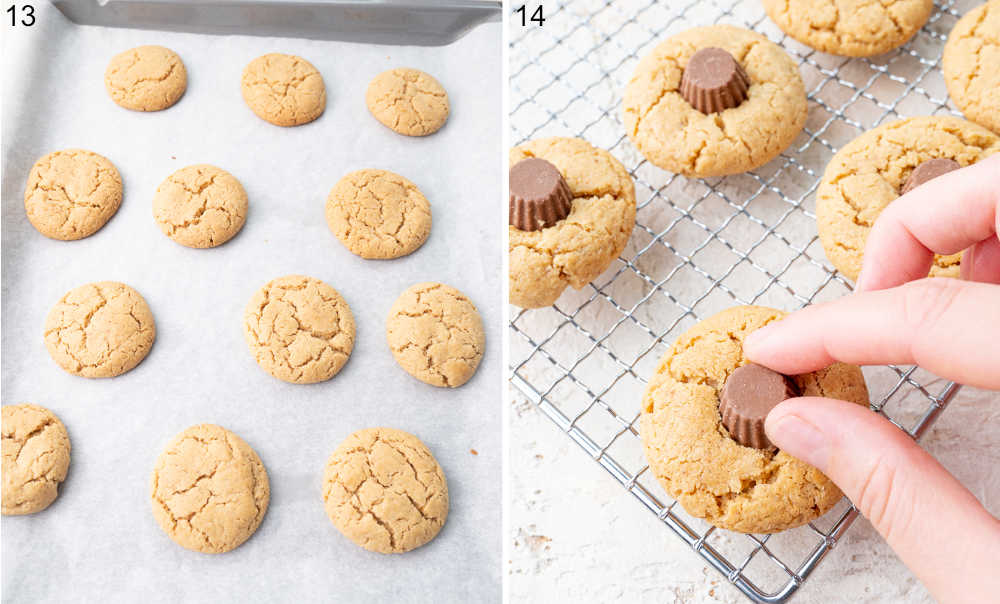
STEP 13: Bake for about 13 minutes.
Don’t overbake the cookies or they will be crumbly.
STEP 14: The cookies will be completely soft right after baking. Leave them on the baking sheet for about 5 minutes or until they can hold their shape and be picked up. Transfer them on a flat spatula to a cooling rack and leave for a couple of minutes until cooled down a little bit but not completely – they should be still a little bit warm.
Place one peanut butter cup in the center of each cookie. The residual heat from the cookies should melt the bottom of the peanut butter cups so that their bottom melts just slightly and “glues” itself to the cookie. The cookies can’t be very warm or the peanut butter cups will melt too much. On the other hand, if your cookies are too cold, the peanut butter cups won’t melt and stick to the cookies – in that case, spread a small amount of melted chocolate on the bottom of each peanut butter cup and place on top of the cookies.
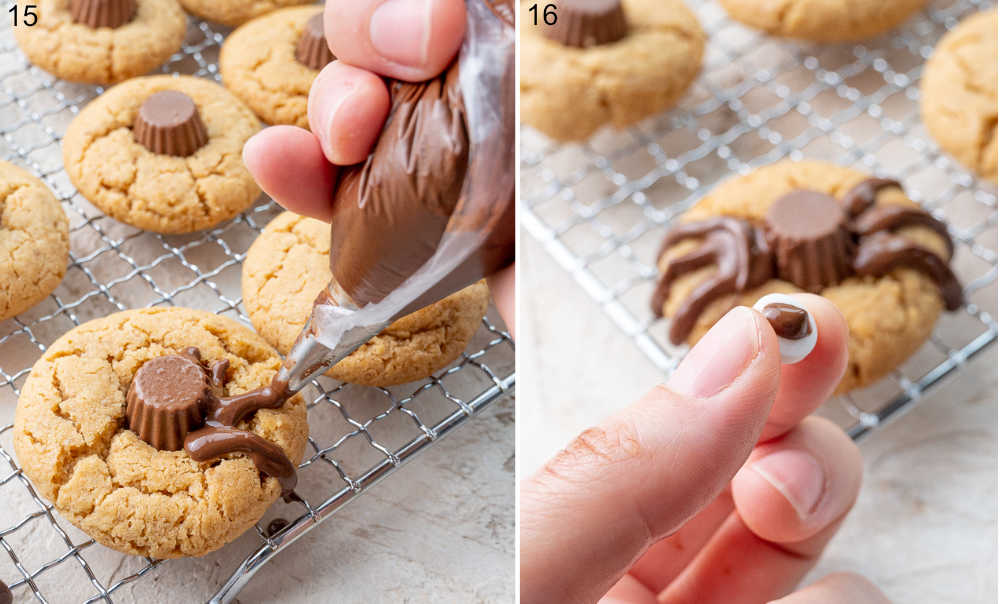
STEP 15: Pipe spider’s legs on the cookies: Cut off a corner in a plastic bag, place a small round piping tip in the bag (optional but it makes piping easier), pipe 6 “legs” around the peanut butter cups to resemble spider’s legs. Use a small amount of chocolate to “glue” the candy eyes to peanut butter cups to resemble spider’s “eyes”.
Leave the cookies for 10-15 minutes or until the chocolate is set (you can also put them in the fridge to speed up this process for 5-10 minutes).
Enjoy!
Storage
These cookies store really well – will keep in a tightly closed container or cookie tin for up to 3 days (even longer but will get too soft). If you use regular chocolate it will become grey after a day so I recommend using baking chocolate which is already tempered and keeps a nice color.
You can keep unbaked cookie dough in the fridge for up to 2 days. Bring to room temperature before baking or the cookies will be too thick.
This cookie dough also freezes very well. Freeze cookie dough balls for up to 3 months.
More fun Halloween treats for kids
- Strawberry Ghosts (Halloween Chocolate Covered Strawberries)
- Mummy apple hand pies – easy Halloween treats
- Pretzel spiders – healthy Halloween treats
- Meringue Ghosts
- Pizza Mummies
- Mummy Hot Dogs

Did you make this recipe? RATE THE RECIPE or tell me in the COMMENTS how you liked it! You can also add a photo of your dish. It would make me very happy and will help other readers. Thank you!!
Spider Cookies
Ingredients
for the peanut butter cookies:
- 1/2 cup (115g) soft butter
- 1/2 cup (130g) creamy peanut butter at room temperature
- 1/3 cup (65g) granulated sugar
- 2/3 cup (135g) light brown sugar
- 1 large egg
- 1 teaspoon vanilla extract
- 1 tablespoon milk
- 1 3/4 cups (220g) all-purpose flour spooned and leveled not scooped
- 1 teaspoon baking soda
- 1/2 teaspoon fine sea salt
- 1/4 teaspoon cinnamon
additionally:
- 36 Reese's Minis unwrapped (peanut butter cups) or Lindt Lindor candy truffles
- 72 candy eyes
- 4 oz (115g) baking milk chocolate or chocolate chips
Would you like to save this?
Instructions
- Start with melting the chocolate: chop the chocolate into small pieces and place in a heat-proof bowl. Place the bowl on a small pot filled with boiling water. Let stand for a minute then stir until the chocolate is melted. Set aside to thicken a bit (you can put it in the fridge for 5-10 minutes). The chocolate should still be pourable but not as runny as just melted (it will be easier to pipe).
- Place Reese’s peanut butter cups in the fridge (unwrapped).
- Preheat the oven to 350°F (180°C).
- Add soft butter and room temperature peanut butter to a mixing bowl. Mix with a hand mixer or a stand mixer fitted with a paddle attachment for about 1-2 minutes or until smooth (scrape the sides of the bowl with a spatula if needed).
- Add both types of sugar and mix for a further 2-3 minutes or until well-combined and paler in color.
- Add egg, vanilla, and milk. Mix for a minute or until well-combined.
- In a medium bowl, whisk together flour, salt, cinnamon, and baking powder.
- Add the flour mixture to the mixing bowl. Mix at low speed until almost combined. Stir the mixture with a spatula until combined. Don’t stir it for too long, just until combined and you see no white streaks of flour.
- Prepare 3 baking sheets lined with parchment paper.
- Roll the cookie dough into 1-inch (2-3 cm) balls and place apart on the baking sheet.
- Bake for about 13 minutes.
- The cookies will be completely soft right after baking. Leave them on the baking sheet for about 5 minutes or until they can hold their shape and be picked up. Transfer them on a flat spatula to a cooling rack and leave for a couple of minutes until cooled down a little bit but not completely – they should be still a little bit warm.
- Place one peanut butter cup in the center of each cookie. The residual heat from the cookies should melt the bottom of the peanut butter cups so that their bottom melts just slightly and “glues” itself to the cookie. The cookies can’t be very warm or the peanut butter cups will melt too much. On the other hand, if your cookies are too cold, the peanut butter cups won’t melt and stick to the cookies – in that case, spread a small amount of melted chocolate on the bottom of each peanut butter cup and place on top of the cookies.
- Pipe spider’s legs on the cookies: Cut off a corner in a plastic bag, place a small round piping tip in the bag (optional but it makes piping easier), pipe 6 “legs” around the peanut butter cups to resemble spider’s legs. Use a small amount of chocolate to “glue” the candy eyes to peanut butter cups to resemble spider’s “eyes”.
- Leave the cookies for 10-15 minutes or until the chocolate is set (you can also put them in the fridge to speed up this process for 5-10 minutes).
- Enjoy!
Notes
- Peanut butter – I used really thick peanut butter, if yours is rather runny (natural peanut butter), omit the milk.
- Peanut butter cups – I used ‘Reese’s Minis unwrapped’ but you can also use regular Reese’s miniature peanut butter cups (they are a little bit bigger than Minis unwrapped). Alternatively, you can use Lindt Lindor candy truffles but I prefer smaller candy so that you can eat more cookies 😉
- How to measure flour: Fluff the flour by stirring it in the bag/flour container with a spoon. Spoon the flour and sprinkle it into your measuring cup. Sweep off the excess flour with the back of a knife. Use a digital scale for best and consistent results. It’s important to measure flour correctly so your cookies are not crumbly.
- Calories = 1 cookie (1/36 of the recipe). This is only an estimate!





No Comments