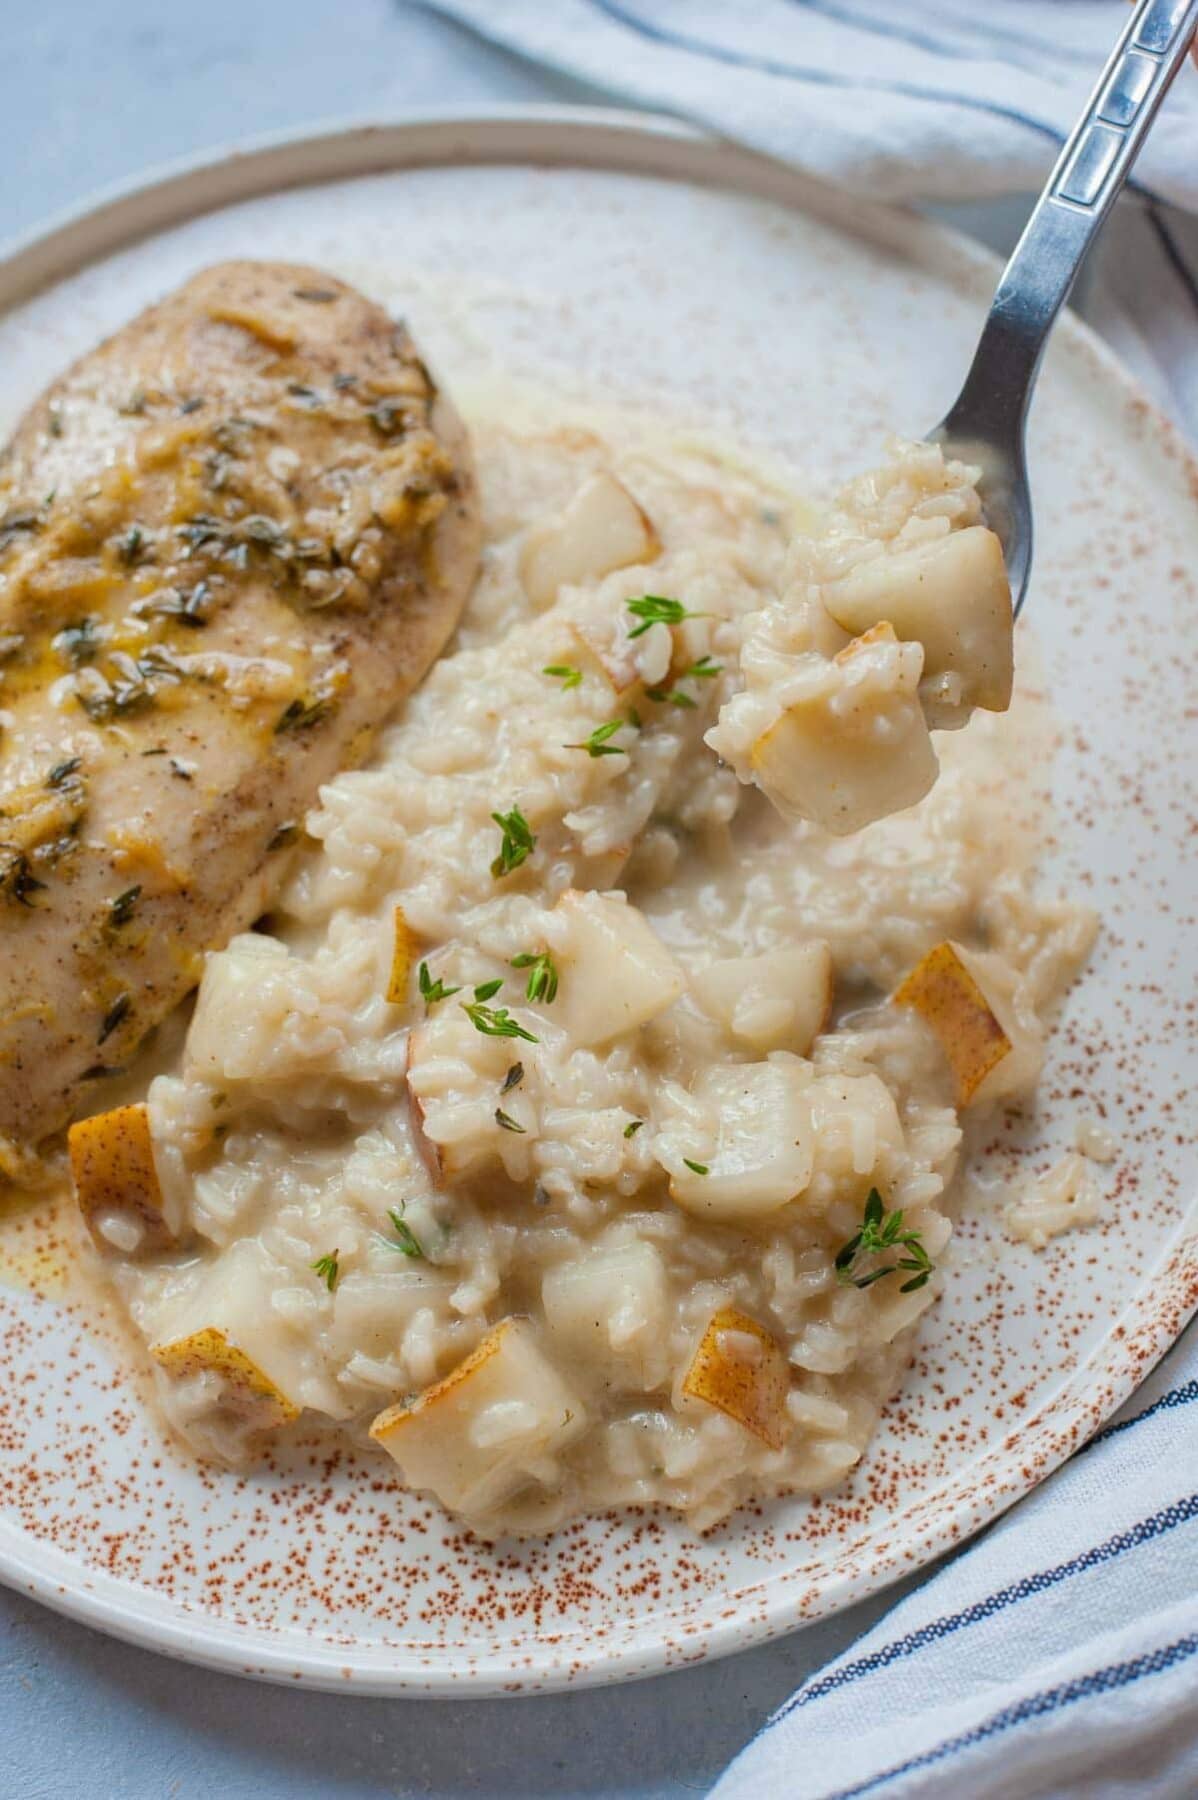
This delicious pear risotto is made with a handful of ingredients but impresses with its taste and texture! It’s seasoned with fresh thyme and garlic. I also added gorgonzola cheese – it adds an amazing bold flavor to the risotto and makes it more creamy. If you would prefer it milder, you can add Parmesan cheese. All the richness and creaminess are balances with crisp dry white wine (or lemon juice).
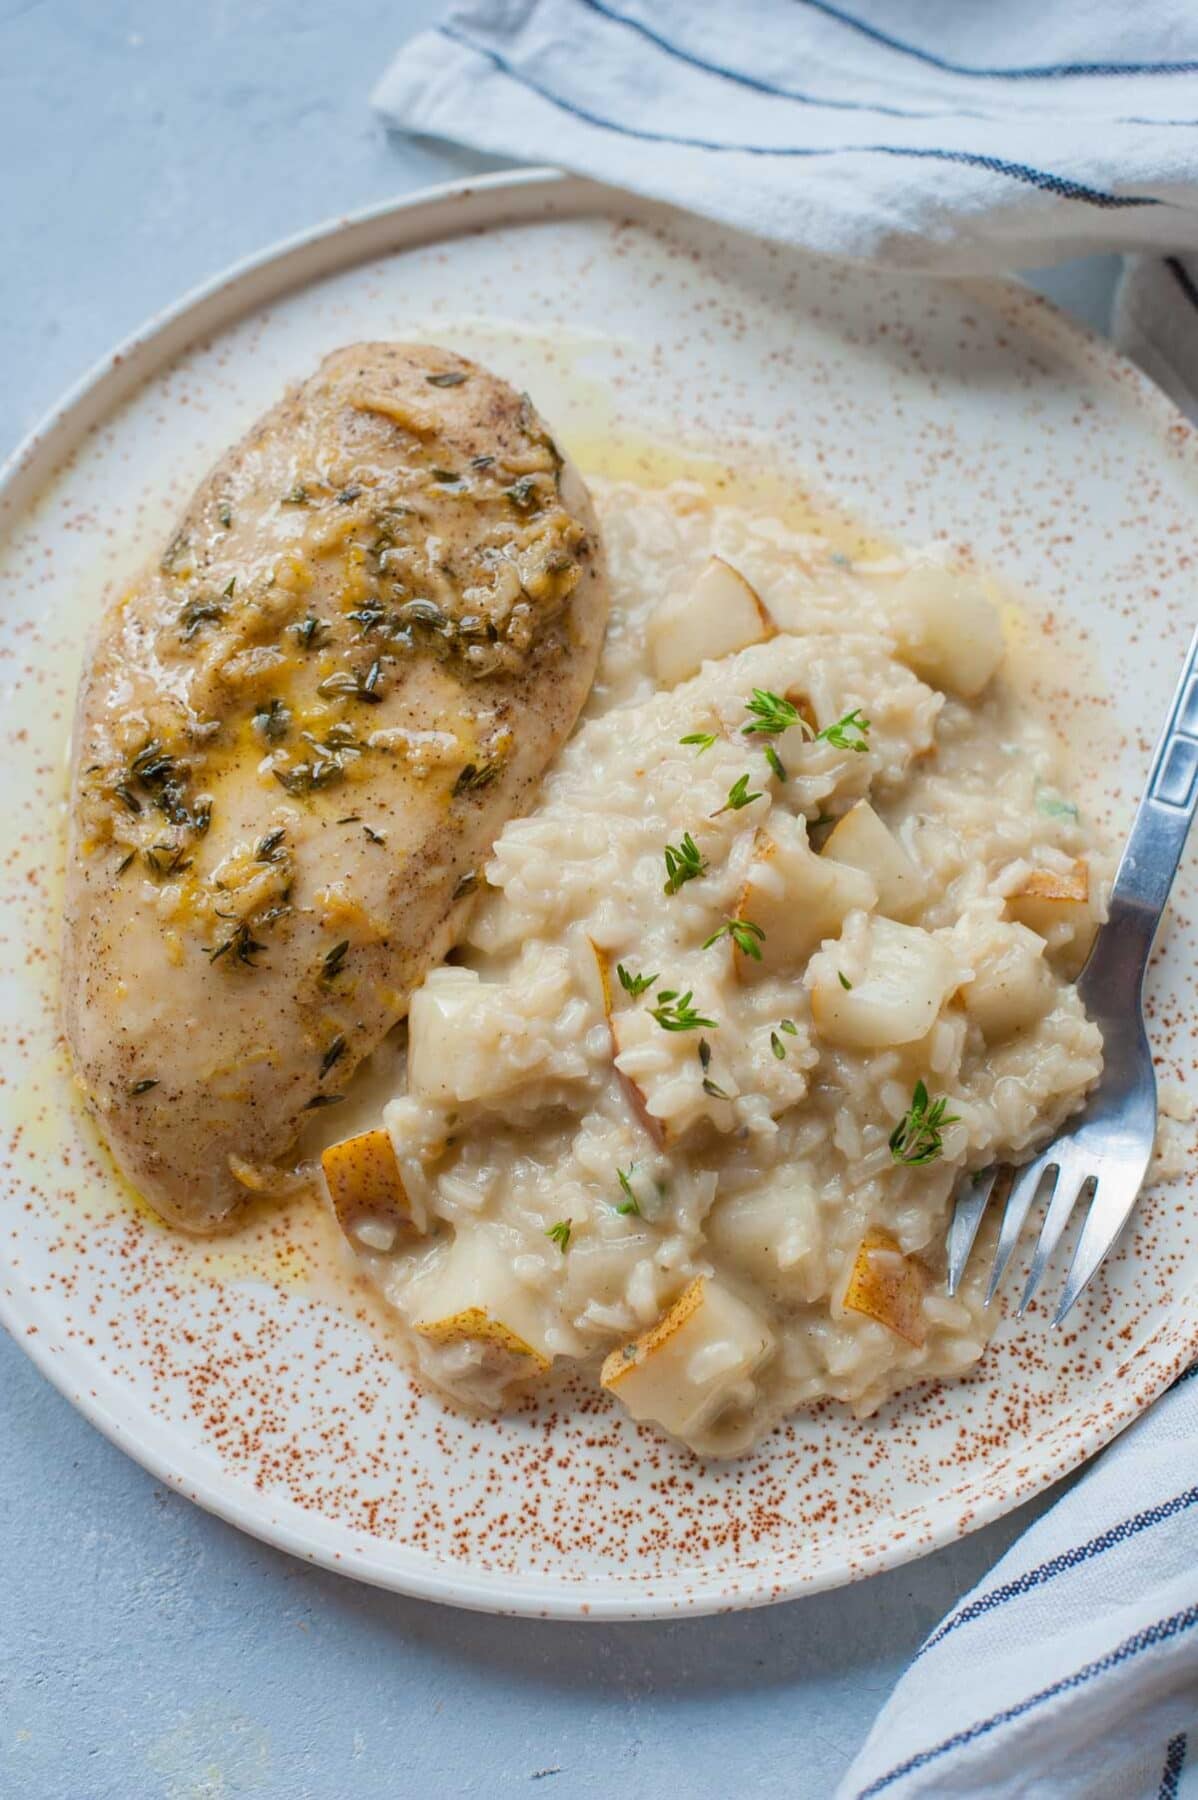
This risotto is savory and just slightly sweet and pairs perfectly with fish or chicken – I especially love to serve it with my lemon thyme baked chicken breast. Together, they make a really easy and impressive dinner!
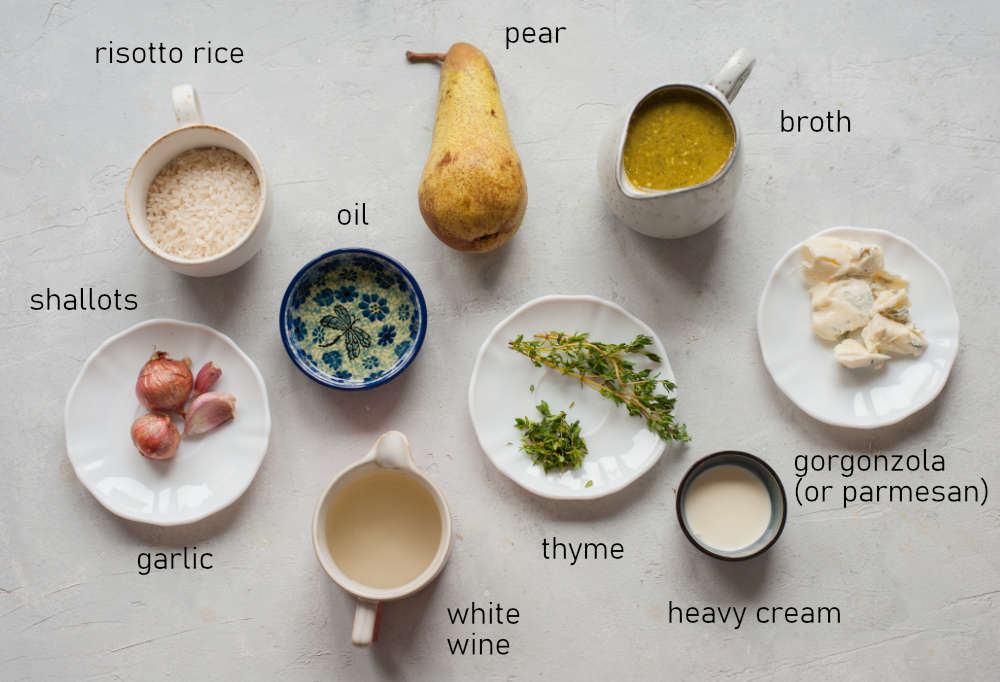
Ingredients and substitutions:
- Pear – it’s best to use a firm pear that is not ripe, but if you only have a soft, ripe pear, cook it just for a minute, instead of 5 minutes.
- Cheese – use gorgonzola cheese for a nice, bold flavor, or if you don’t like it, just add grated Parmesan cheese.
- Broth – you can use vegetable or chicken broth. Water with good-quality bouillon cubes will also do!
- Rice – you need to use risotto rice, like arborio or carnaroli rice. Other rice varieties are not suitable for this recipe! These rice types have a lot of starch on their surface, which makes the risotto creamy.
- Shallots – you can use small onion instead. I prefer shallots because of their mild flavor and soft texture, also because they cook quicker.
- Garlic – must be fresh!
- Thyme – best is fresh but you can substitute dried thyme with no problems.
- Heavy cream – makes the risotto more creamy. Substitute for milk or omit it.
- White wine – just use any white wine you like to drink. It must be a dry wine – it needs to balance the richness and sweetness of the risotto. If you don’t have wine on hand or you don’t cook with wine, you can easily substitute it with 1 tablespoon of lemon juice (it equally delicious, so there is no reason to buy wine just for this recipe!).
How to make pear risotto step by step:
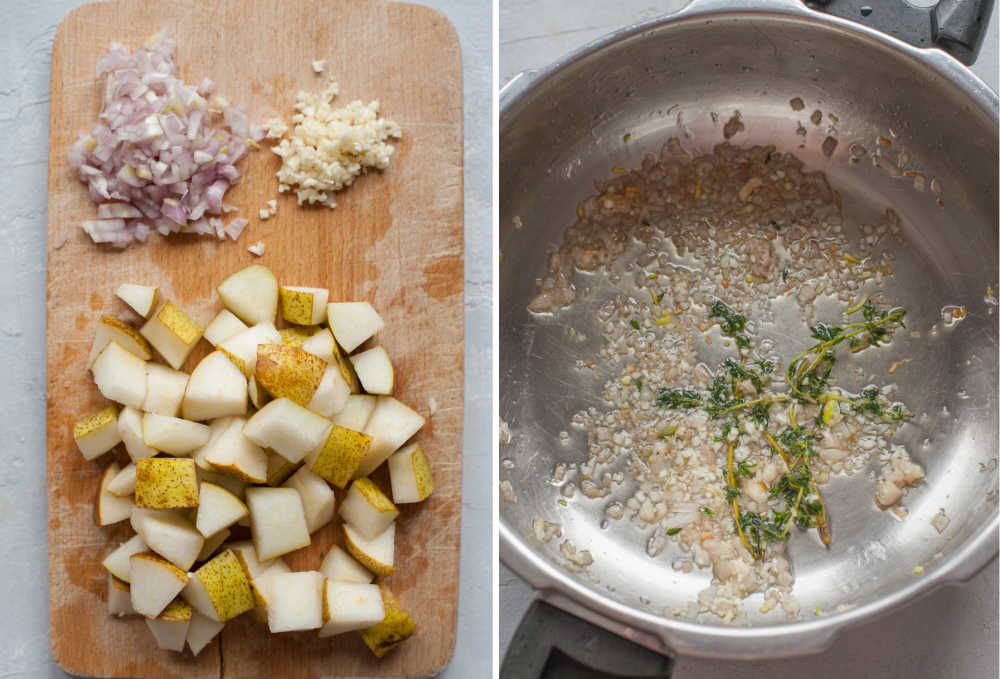
STEP 1: Prep your ingredients: dice the pear, chop onions and garlic.
STEP 2: Cook the shallots with garlic and thyme twigs until soft. Discard thyme.
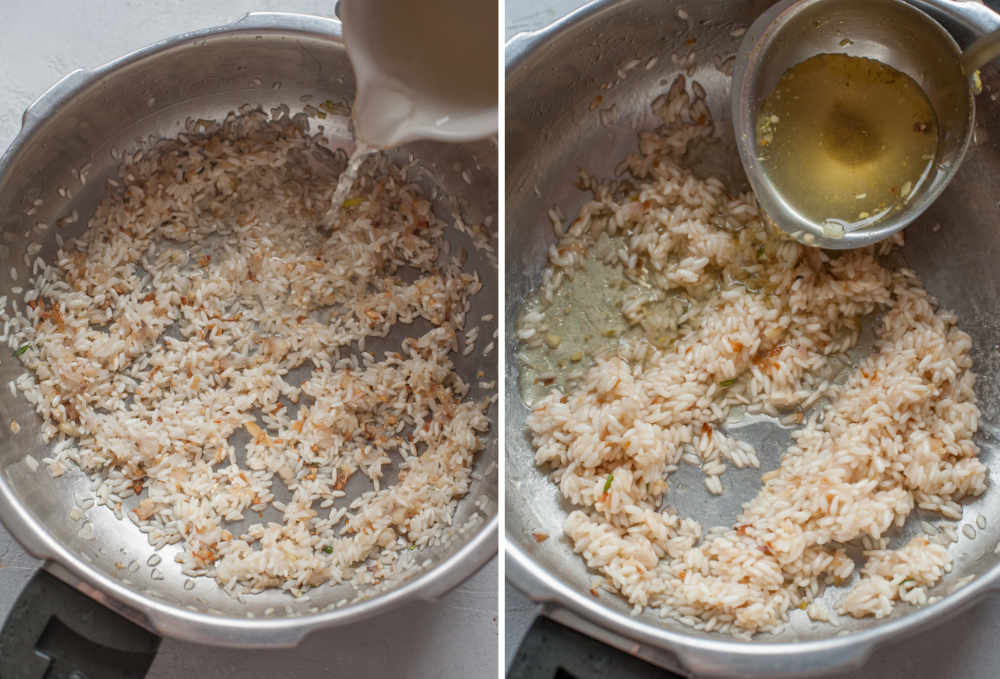
STEP 3: Add the wine or lemon juice and cook until almost evaporated.
STEP 4: Cook the risotto: Warm up the broth in a small pot, keep it on the burner over low heat, it should be hot all the time. Add the broth gradually (about 1/4 cup at a time) until the rice is almost cooked. It will take about 20-25 minutes. Add the next portion of the broth when the previous one has been absorbed by the rice. Stir the rice from time to time making sure it’s not sticking to the pot.
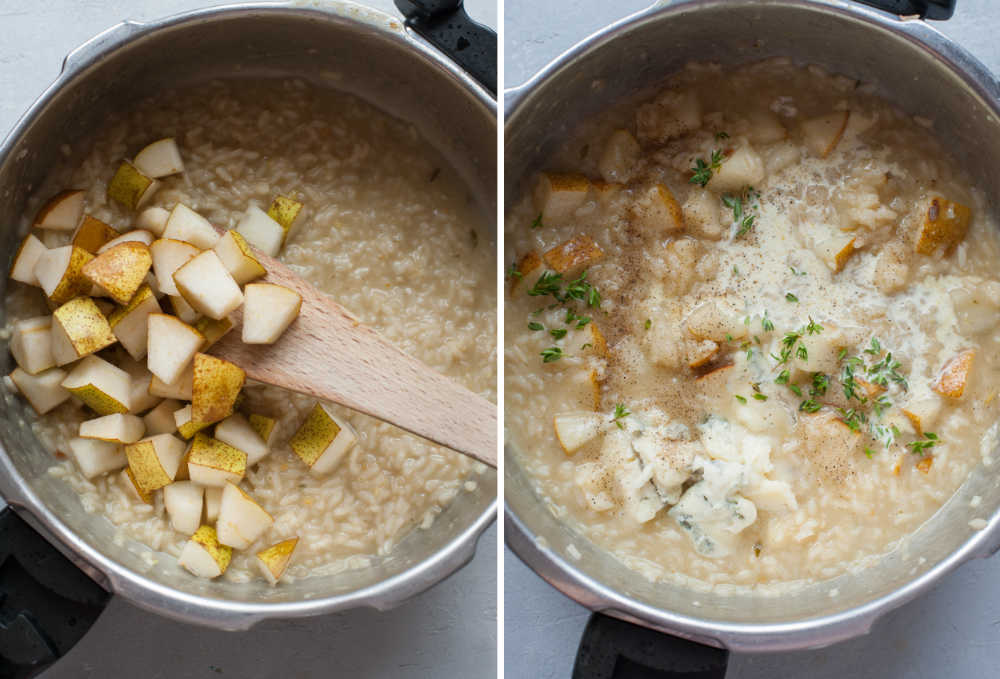
STEP 5: Add the pear and cook for a couple of minutes until it’s softened and the rice is perfectly cooked al dente (it should be soft but still have a little bit of bite to it). Take the pot off the heat.
STEP 6: Add the cheese, cream, and thyme leaves. Stir until the cheese is melted. Season to taste with salt and pepper.
Enjoy!
How the risotto should look like / How to know if your risotto is done?
- The texture and consistency of risotto are very important. It’s best to serve it on slightly warm plates. While it cools down it becomes too thick. Warm plates keep in nice and creamy.
- Great risotto shouldn’t be too runny/soupy but it also can’t be too thick. If you run your spatula through the risotto, it should flow slowly to fill in the space.
- Risotto should be cooked al dente – the rice grains should be soft but still a little bit chewy in their centers.
How to serve it:
This flavorful risotto pairs perfectly with fish or chicken, try it with:
- baked lemon thyme chicken breast – it’s absolutely perfect with this pear risotto!
- simple pan-fried chicken breast of white-fleshed fish
- whole roasted trout
- simple green salad with vinaigrette
Tips for the best risotto
- Keep your broth hot all the time while the risotto is cooking. Adding cold broth to the pot will result in a longer cooking time, as the broth will need to be brought to a boil all the time.
- Serve your risotto on warm plates. The best risotto should flow off the spoon like a wave, when it gets cold, it loses this consistency. It’s best to serve it straight from the pot and transfer it to warm plates. You can warm your plates in the oven – just keep them a few minutes in the oven preheated to 210°F/100°C (you will see the difference!).
- Don’t overcook your risotto, the rice grains should still have a bite to them!
- Stir the risotto often, but not too oft (it will cool the rice), and make sure it won’t stick to the pot.
- Don’t add too much broth at once – 1/4 cup to 1/3 is perfect.
No-stir risotto
There is an alternative preparation method of this risotto, popularized by a well-known chef Kenji Lopez-Alt. It’s a no-stir risotto, which saves a lot of your time, but it is slightly less creamy than the traditional recipe. You will need only 1 and 1/4 cups (300ml) broth when making risotto this way.
Here’s how to do it:
- Add rice to the broth and stir several times with a spoon, strain through a fine-mesh strainer, then reserve the broth (!). Cook the onion, garlic, rice, and wine as described in the recipe.
- Add the broth (it can be cold), stir well, bring to a boil, cover the pot, and simmer over low heat for 10 minutes. Add the pear, cook for another 5 minutes.
- Remove the pot from the heat, add the cheese, cream, and thyme leaves, season with salt and pepper to taste, and serve.
Storing and reheating:
Risotto reheats very well. It will be thicker so add a splash of water to dilute it. Keep it in the fridge for up to 2 days. You can also freeze it for up to 6 months.

More risotto recipes:
- saffron risotto
- lemony asparagus and peas risotto
- a twist on classic risotto: buckwheat risotto!
Did you make this recipe? Let me know how you liked it and give it a star rating in the comments below! You can also add a photo of your creation!
Pear risotto with gorgonzola
Ingredients
- 2 tablespoons frying oil
- 2 shallots or 1 small onion
- 3 twigs thyme + heaped teaspoon thyme leaves
- 2 cloves garlic
- 1/2 cup (100g) risotto rice
- 3 tablespoons dry white wine or 1 tablespoon lemon juice
- 2.5 cups vegetable or chicken broth
- 1 medium pear preferably firm
- 1 oz (30g) gorgonzola cheese or 2 tablespoons grated Parmesan cheese
- 1 tablespoon heavy cream
- salt and pepper to taste
Would you like to save this?
Instructions
- Cut the shallots/onion into small cubes, finely chop garlic, cut the pear into 1/2-inch (1cm) cubes (no need to peel it).
- In a wide and shallow pot heat the oil, add the onion and thyme twigs, cook over low heat for about 4 minutes or until soft and translucent.
- Add the garlic and cook for about 30 seconds, until fragrant.
- Add the rice and cook over medium heat for about 2-3 minutes. All rice grains should be coated in oil and their edges should be slightly translucent. Remove and discard thyme twigs.
- Add the wine (or lemon juice), cook until it’s almost evaporated.
- Warm up the broth in a small pot, keep it on the burner over low heat, it should be hot all the time.
- Now gradually add the broth, about 1/4 cup at a time, and cook, stirring from time to time, until the rice has absorbed all the broth. Add the next portion of the broth when the previous one has been absorbed. The whole process of adding broth and stirring should last about 25 minutes. After this time, the rice grains should be almost cooked. You can use more or less broth than I did, it all depends on the burner’s heat.
- Add the pear and cook for about 5 more minutes, adding more broth if necessary. Now the rice should be soft but still have a little bit of bite to it (it should be cooked al dente). Take the pot off the heat.
- Add the gorgonzola cheese (or parmesan cheese), heavy cream, and reserved thyme leaves. Stir until the cheese is melted. The risotto should be creamy, it shouldn’t be too runny but it also can’t be too thick. If you run your spatula through the risotto, it should flow slowly to fill in the space.
- Season with salt and pepper, to taste.
- Enjoy!
Notes
- If you only have a soft, ripe pear, cook it just for a minute, instead of 5 minutes.
You can substitute cream with milk or omit it. - Storage: Risotto reheats very well. It will be thicker so add a splash of water to dilute it. Keep it in the fridge for up to 2 days. You can also freeze it for up to 6 months.
- It’s best to serve risotto on warm plates. The best risotto should flow off the spoon like a wave, when it gets cold, it loses this consistency. You can warm your plates in the oven – just keep them a few minutes in the oven preheated to 210°F/100°C.
- Calories = 1 serving (1/2 of the recipe). This is only an estimate!




No Comments