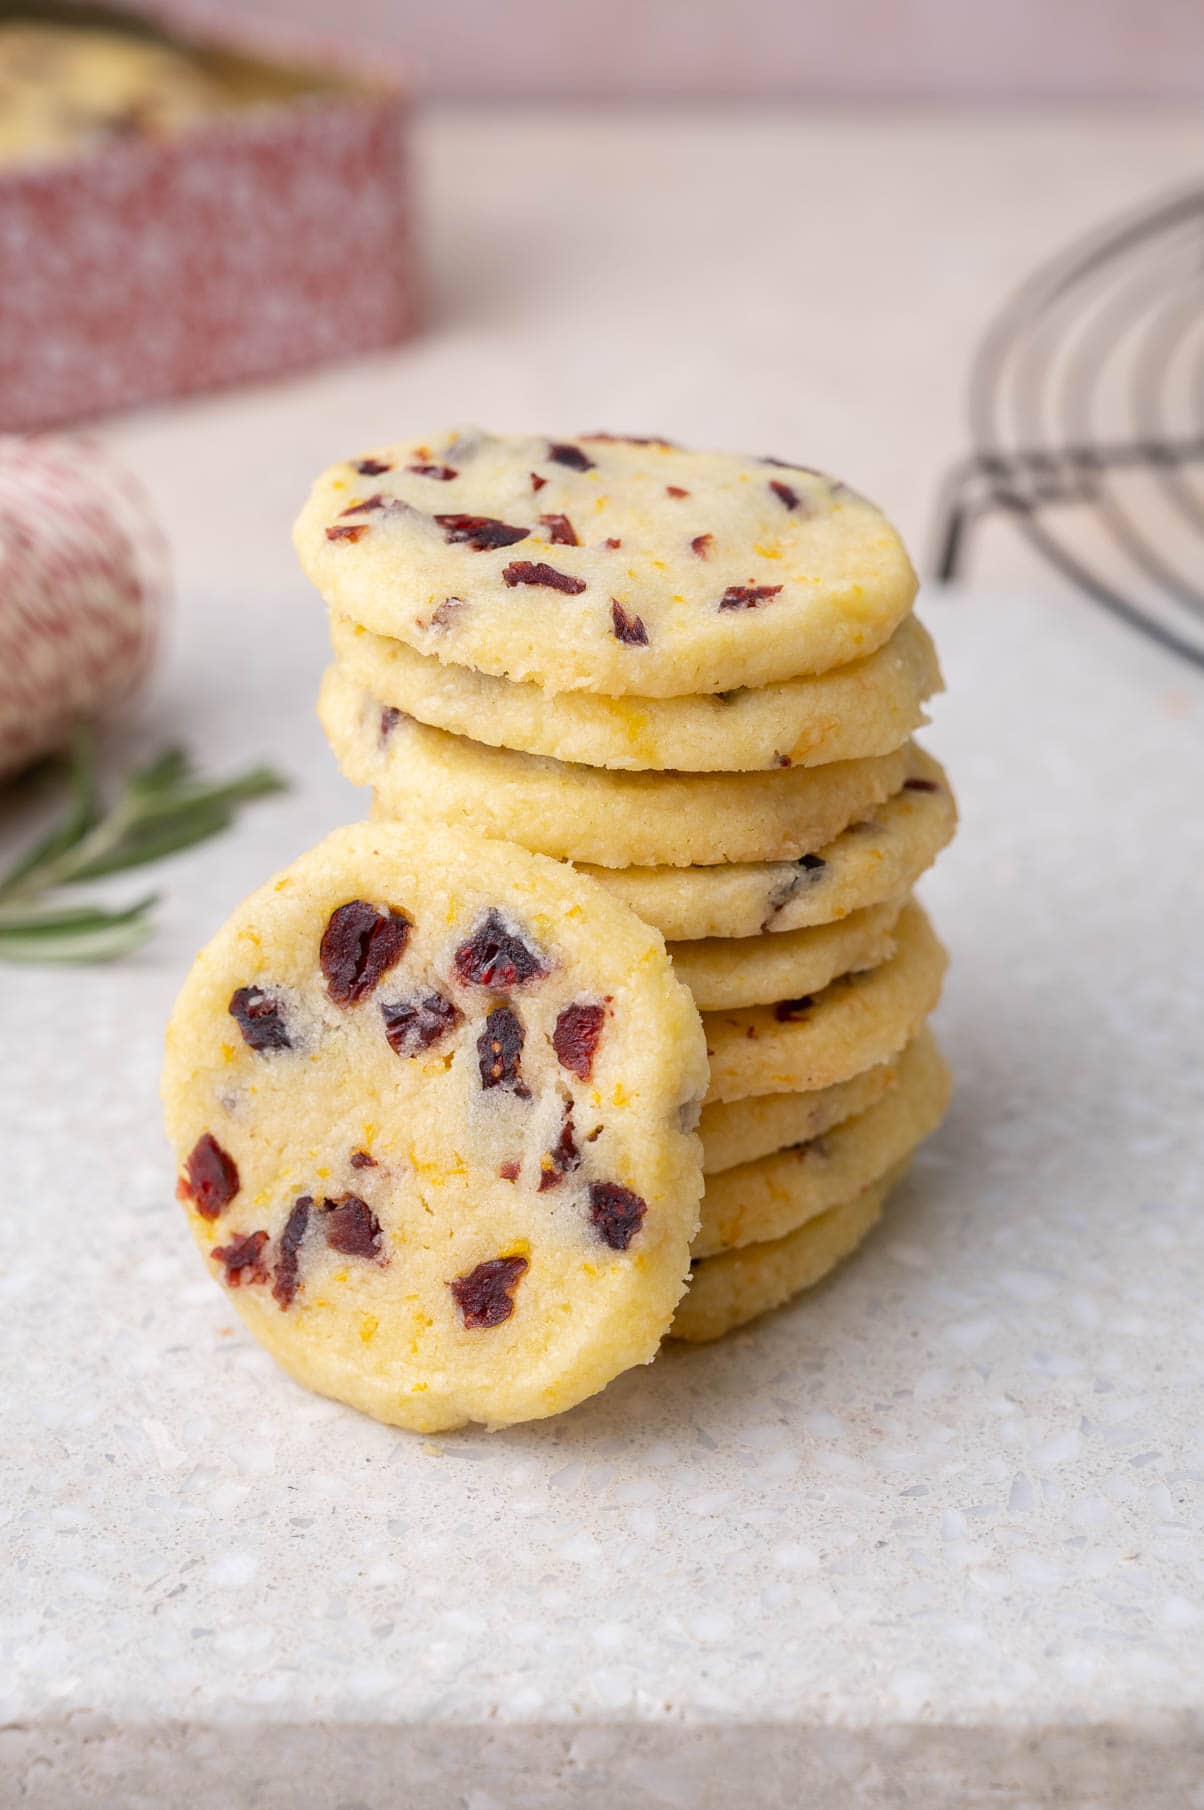
These cranberry shortbread cookies are buttery, crumbly, and simply melt in your mouth! They have bits of dried cranberries and a citrusy orange flavor. They are very easy and quick to make – just combine the ingredients, chill the dough, slice, and bake!
You may also like these fresh cranberry white chocolate cookies.
Ingredients
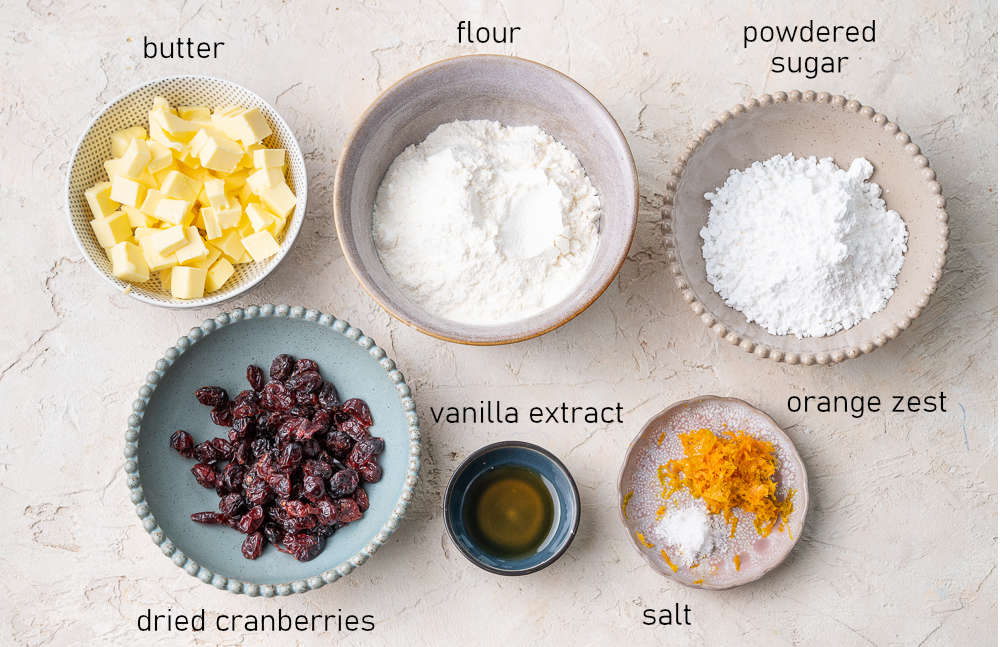
Here’s what you need to make these delicious cookies:
- flour
- butter – we’re starting with cold butter so there’s no need to wait for the butter to soften!
- powdered sugar
- orange zest (a must!) – I really like to add lots of it, even from 2 oranges
- salt
- vanilla extract
- dried cranberries
These cookies are moderately sweet, if you’d like them sweeter, you can dip half of a cookie in melted white chocolate.
Step-by-step instructions
Before you start:
How to measure flour: if you use a kitchen scale to measure out all the ingredients, it all goes easy breezy! But if you’re using measuring cups, remember that 1 cup of flour can weigh 120-150g, depending on how you’re filling your cup. Don’t scoop the flour directly into the measuring cup, which can compact it! 1 cup of flour in my recipes weighs 125g. To correctly measure the flour, you need to:
- Fluff the flour by stirring it in the bag/flour container with a spoon.
- Spoon the flour and sprinkle it into your measuring cup.
- Sweep off the excess flour with the back of a knife.
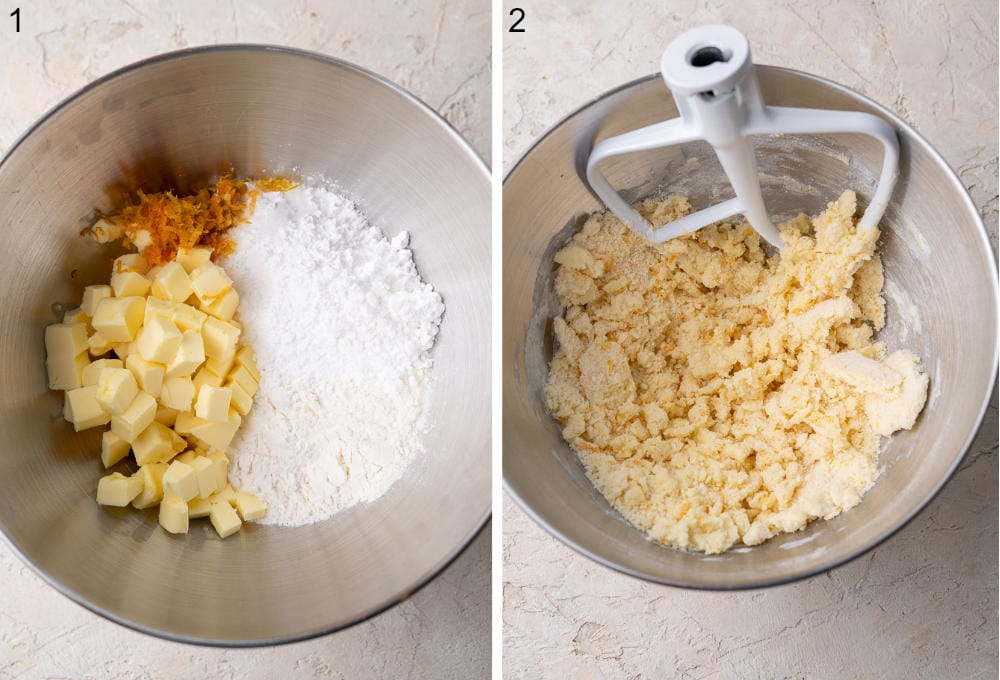
STEP 1: Add all the ingredients except the cranberries into a mixing bowl.
STEP 2: Mix with a stand mixer using a paddle-shaped attachment at low speed until the butter chunks are very small and the mixture looks like a crumble. The dough should almost come together, but it should still be crumbly. You can check the photos in the body of the post or the video for reference.
You can also combine the ingredients by hand – rub the butter with flour and other ingredients until crumbles form. You can also use a pastry cutter for that.
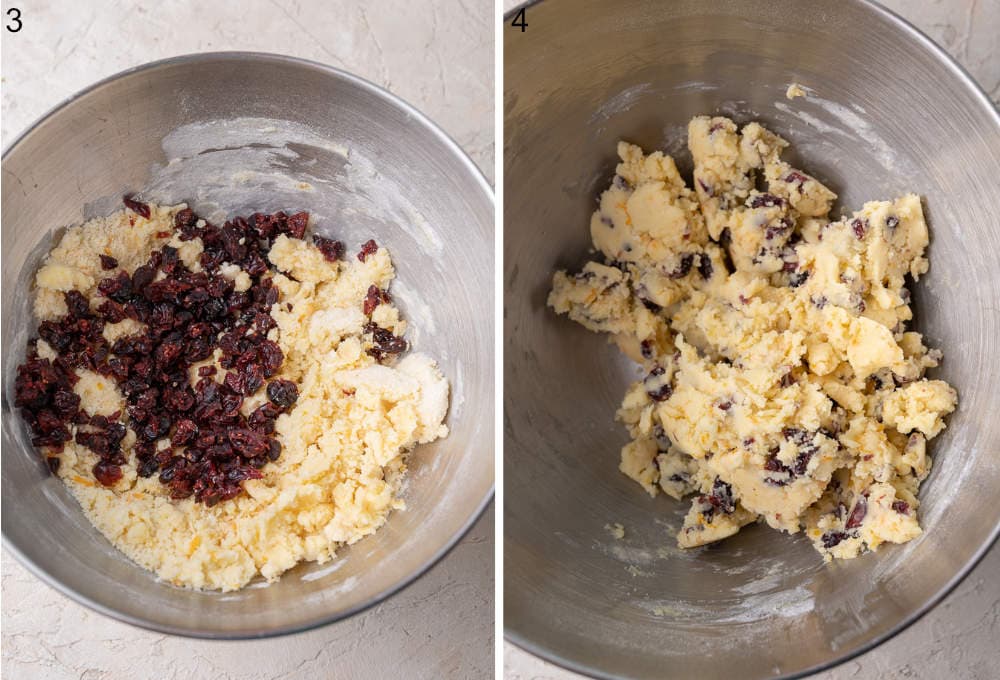
STEP 3: Roughly chop the cranberries and add them to the bowl.
STEP 4: Mix until the dough comes together (you should have big clumps of smooth dough in the bowl).
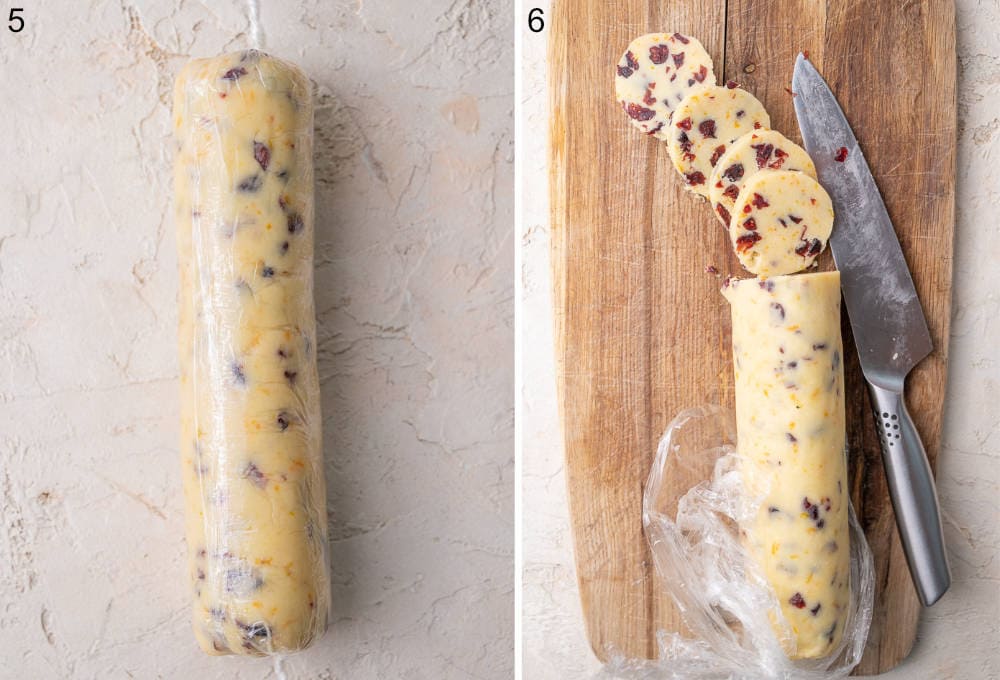
STEP 5: Gather the clumps of dough and place them on a piece of plastic foil. Wrap the dough in the foil and shape into a 2-inches (5cm) thick log.
STEP 6: Put the cookie dough in the freezer to chill and firm up for 30 minutes or refrigerate for at least 3 hours or overnight.
Unwrap the cookie dough and cut with a sharp knife into 1/3-inch (3/4 cm) slices (slicing/sewing motion is more efficient).
STEP 7: Place the slices on a baking sheet lined with parchment paper about 2-inches (5cm) apart.
If your slices are not nicely round or not of even thickness, you can shape them now to improve their shape.
STEP 8: Bake at 350°F (175°C) for about 10 minutes.
The baking time may vary depending on the oven. The cookies should be just slightly golden at the bottom but completely pale on top and at the edges. They will be very soft – they will finish baking on the baking sheet. Leave them on the baking sheet until firm enough to pick up then transfer to a wire rack to cool completely.
If your cookies have spread more than you would like, you can shape their edges using a spoon right after taking them out of the oven, when they’re still very soft (just push their edges slightly toward the middle).
Bake the cookies in batches – while you’re baking the first batch, put the remaining dough back in the freezer. Slice the next batch of the dough only when you are ready to bake.
Enjoy!
Storage
These cookies keep very well. Keep them in a tightly closed container (preferably a cookie tin) for up to a week. They will soften with time.
You can also freeze cookie dough: cut the dough log into slices, place them on a baking sheet, and freeze until solid. Transfer them to zip-lock bags or closed containers. Bake them like fresh cookies, straight from the freezer. They may need to be baked 30-60 seconds longer.

Did you make this recipe? RATE THE RECIPE or tell me in the COMMENTS how you liked it! You can also add a photo of your dish. It would make me very happy and will help other readers. Thank you!!
Cranberry Shortbread Cookies (easy slice and bake cookies)
Ingredients
- 1 1/4 cups flour (155g) spooned and leveled, not scooped
- 1 stick + 2 tablespoons cold butter (145g) cut into small cubes
- 1/2 cup powdered sugar (60g)
- zest grated from 1 large orange or 2 medium/small oranges
- 1 teaspoon vanilla extract
- 1/4 teaspoon salt
- 1/2 cup dried cranberries (70g)
Would you like to save this?
Instructions
- Add all the ingredients except the cranberries into a mixing bowl.
- Mix with a stand mixer using a paddle-shaped attachment at low speed until the butter chunks are very small and the mixture looks like a crumble. The dough should almost come together, but it should still be crumbly. You can check the photos in the body of the post or the video for reference. (You can also combine the ingredients by hand – rub the butter with flour and other ingredients until crumbles form. You can also use a pastry cutter for that.)
- Roughly chop the cranberries and add them to the bowl. Mix until the dough comes together (you should have big clumps of smooth dough in the bowl).
- Gather the clumps of dough and place them on a piece of plastic foil. Wrap the dough in the foil and shape into a 2-inches (5cm) thick log.
- Put the cookie dough in the freezer to chill and firm up for 30 minutes or refrigerate for at least 3 hours or overnight.
- Unwrap the cookie dough and cut with a sharp knife into 1/3-inch (3/4 cm) slices (slicing/sewing motion is more efficient).
- Place the slices on a baking sheet lined with parchment paper about 2-inches (5cm) apart. If your slices are not nicely round or not of even thickness, you can shape them now to improve their shape.
- Bake at 350°F (175°C) for about 10 minutes. The baking time may vary depending on the oven (also, the second batch cooks a little bit quicker). The cookies should be just slightly golden at the bottom but pale on top and at the edges. They will be very soft and will finish baking on the baking sheet. Leave them on the baking sheet until firm enough to pick up then transfer to a wire rack to cool completely. If your cookies have spread more than you would like, you can shape their edges using a spoon right after taking them out of the oven, when they're still very soft (just push their edges slightly toward the middle).Bake the cookies in batches – while you're baking the first batch, put the remaining dough back in the freezer. Slice the next batch of the dough only when you are ready to bake.
- Enjoy!
Notes
- These cookies are moderately sweet, if you’d like them sweeter, you can dip half of a cookie in melted white chocolate.
- You can bake these cookies a little bit longer (30-60 seconds), until the edges are slightly golden, if you want your cookies more crunchy.
- How to measure flour: I’m using the “spoon and level method” so 1 cup of flour in my recipes weighs 125g. Fluff the flour by stirring it in the bag/flour container with a spoon. Spoon the flour and sprinkle it into your measuring cup. Sweep off the excess flour with the back of a knife.
- Calories = 1 cookie (1/21 of the recipe). This is only an estimate!



8 Comments
Reka
8 January 2025 at 04:10Tastes awesome. I covered half of the cookies with melted white chocolate chips after seeing your suggestion to someone above. For how long could I keep the roll of dough in the fridge? And freezer? If I’m baking after it has been in the feeezer, do I need to let it thaw at all or just slice and bake?
Aleksandra
8 January 2025 at 10:54I recommend keeping the dough in the fridge for up to 5–6 days or in the freezer for up to 6 months. For freezing, slice the dough first so you can bake cookies directly from frozen. They may need an additional 1–2 minutes of baking time. You can also freeze a whole log and then slice and bake the cookies, but it will be more difficult to slice. You definitely do not need to thaw the dough.
Madeleine
23 March 2024 at 21:51Mine turned out with a nice texture but almost no sweetness and a ton of bitterness from the orange zest. Maybe I zested too much pith? Anyway, I’m going to try this again with either a bit more powdered sugar or maybe with an orange glaze instead of putting zest in the cookies. Thanks for posting this recipe, it was fun to try out!
Aleksandra
24 March 2024 at 05:52I would not add more sugar to the cookies, it will change their texture and posibly make them more flat. I would definitely make an orange or lemon glaze if you want them sweeter. As for the bitterness from the orange, it’s best to use microplane and you only want to grate the orange part not the white part. Thank you for trying out the recipe!
Deb
3 January 2024 at 08:41Best cookies EVER! I did a white chocolate drizzle on top… SO AWESOME!
Aleksandra
3 January 2024 at 15:25they must be even better with the white chocolate drizzle! thank you for leaving the comment!
Irma
20 December 2023 at 09:14I made it according to the recipe, but it didn’t work. Obviously too much butter, which started to melt while baking and the cookies melted
Aleksandra
20 December 2023 at 09:30Then the cookies were not properly chilled (or maybe sliced too thinly?). I made this recipe again 2 weeks ago and it works just fine. You can see on the video how they loook like.