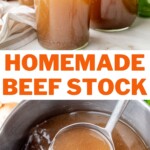
Learn how to make amazing homemade beef stock. You can make a big batch and freeze it, then use it to elevate your favorite soups, stews, and sauces to another level. It’s a super easy recipe that requires almost no effort and produces a wonderfully flavorful stock – the kind you would drink on its own!
Ingredients
Here’s what you need to make this recipe:

Meat + Bones: To make a rich beef stock, you’ll need three key ingredients: meat, meaty bones, and marrow bones. The meat adds flavor and substance, while the meaty bones provide depth and richness. The marrow bones are essential for imparting a deep, savory essence and a silky texture to the broth. These three components come together to create a hearty, flavorful stock.
Vegetables – like onions, carrots, and celery add sweetness and depth, and garlic brings an aromatic touch.
Fresh herbs – such as parsley, thyme, and rosemary – whatever you have on hand.
Spices and aromatics – bay leaves and black peppercorns – add another level of flavor.
Optional additions like tomato paste, dried mushrooms, and a parmesan rind enhance the richness and umami of the final product. Don’t worry—the stock won’t taste cheesy or like mushrooms. These are subtle additions that elevate the overall flavor. As for the anchovy fillets, despite what you might expect, the broth won’t taste fishy. They provide an additional layer of umami flavor. I always freeze any leftover anchovies since it’s hard to use up a whole jar or package, and adding them frozen to the broth works perfectly.
Apple cider vinegar – is used in beef stock to help extract calcium and other minerals from the bones. The acidity of the vinegar breaks down the bone structure, releasing these nutrients into the broth, which contributes to the stock’s rich flavor and nutritional value.
Cooking methods: simmering vs. roasting
There are two common methods for making beef stock: simmering the ingredients directly in cold water or roasting the bones, meat, and vegetables first.
I tested both methods side by side and found the flavor difference to be minimal. While the roasted stock had a slightly sweeter, more caramelized taste, the difference wasn’t significant enough to justify the extra step of roasting. Simmering the ingredients directly in the pot produced a rich, flavorful stock with less effort and hands-on time (you still need to simmer it for multiple hours).
You may try both methods to find out what works better for you (the description for both methods is included below).
How to make it step-by-step
Method 1: Simple Simmering Method
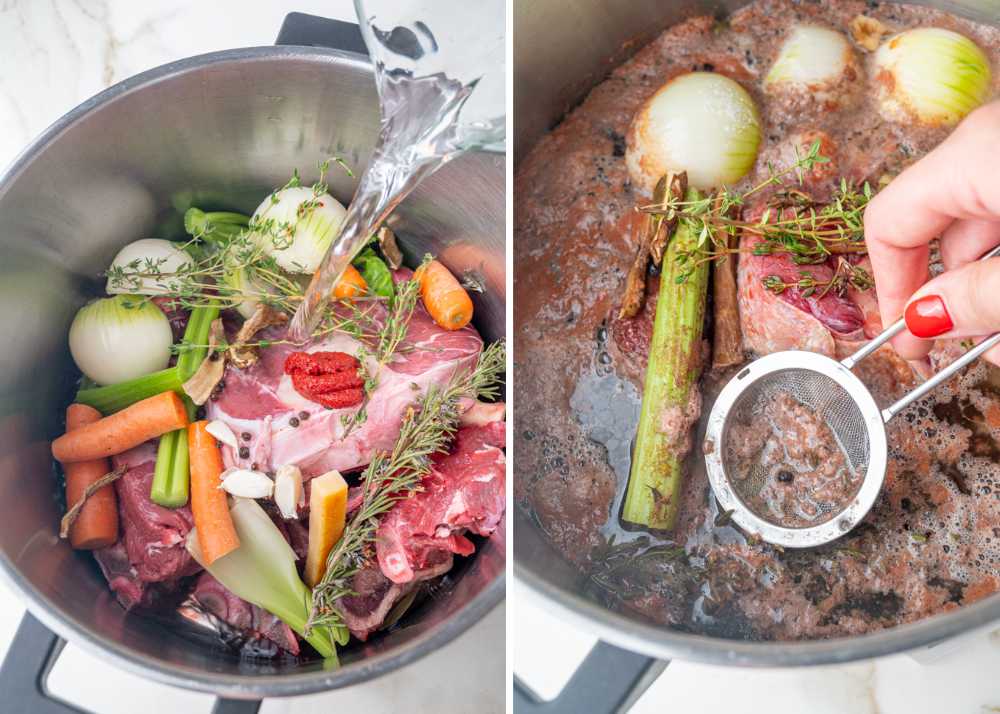
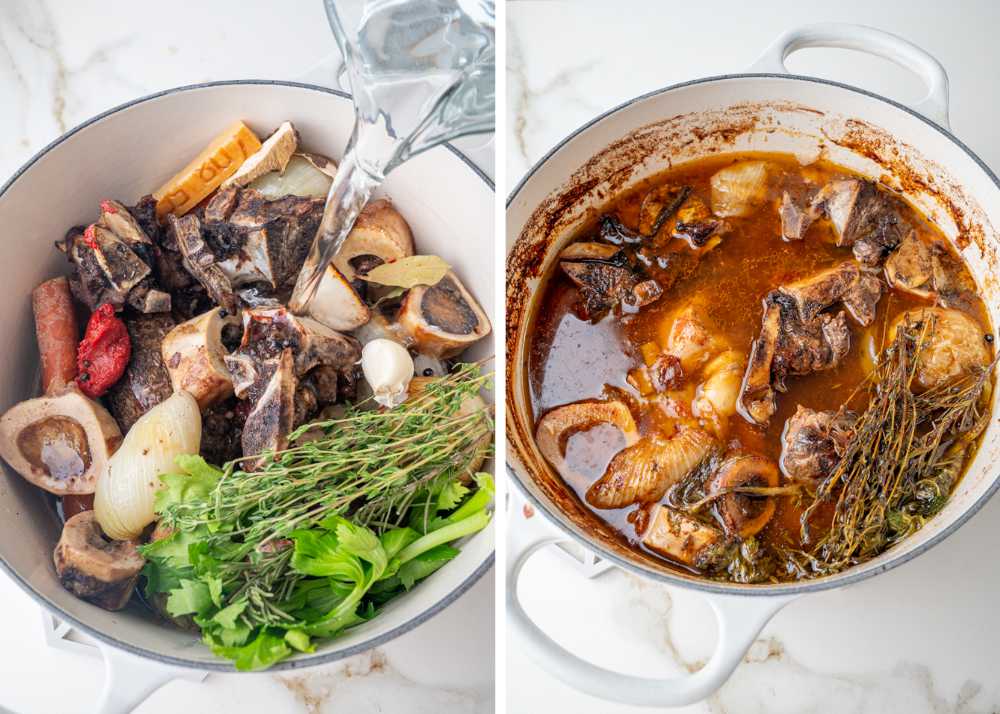
Add all the ingredients into a very large pot, ensuring that the herbs, spices, and all the “small” ingredients are placed beneath the meat. This step is optional but helps make skimming the stock easier.
Slowly bring the pot to a boil, then reduce the heat to the lowest setting—just enough to maintain a very gentle simmer. Avoid cooking over higher heat, as this will make the stock cloudy.
As the stock comes to a boil, use a small sieve to skim off the foam or scum that collects on the surface (optional, but it will make the stock clearer, although it doesn’t affect the flavor).
Simmer the stock for 6 hours or longer (a minimum of 3-4 hours will suffice, but the flavor improves with extended cooking).
Do not add any more salt, it’s better to season the dish you’ll use the stock in later.
Method 2: Roasting and Simmering
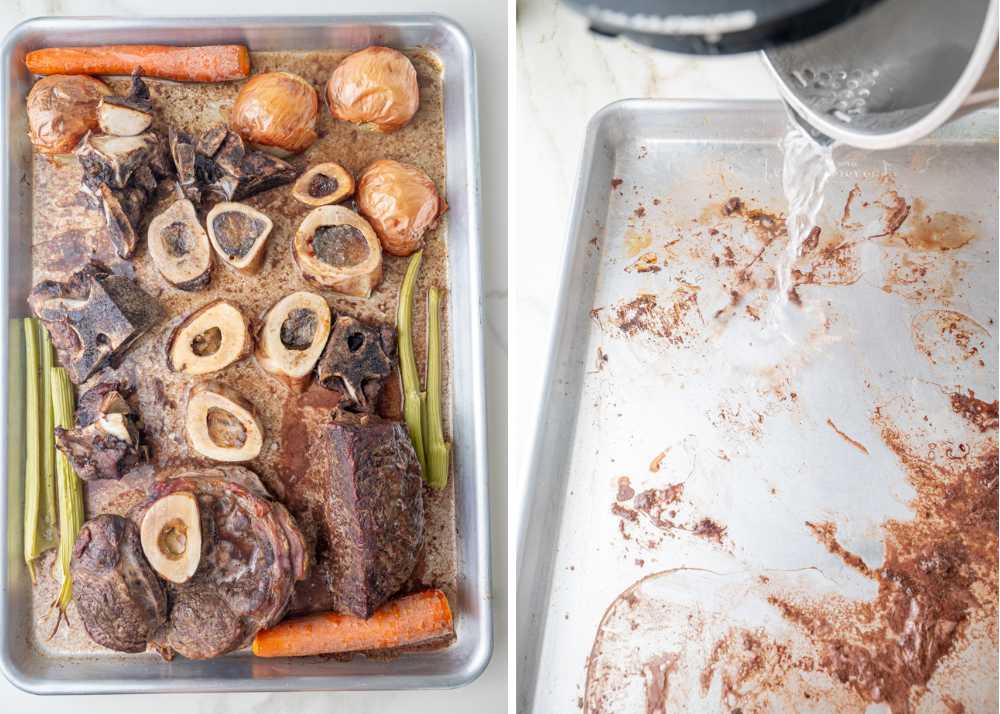
Place all the meat, bones, and vegetables on a large baking sheet and roast at 400°F (200°C) for 30 minutes. Then flip the meat and bones to the other side and continue roasting for an additional 20 minutes, or until they are well browned.
Place all the meat, bones, and vegetables in a very large pot. Pour some hot water over the baking sheet and use a spatula to scrape up all the browned bits. Add this liquid to the pot.
Add water and all the other ingredients to the pot and cook as described above.
What you could also do: Instead of roasting the meat and bones, you could also brown them directly in the pot you’ll use for cooking your stock. Simply heat some oil over high heat and brown the meat and bones on both sides until they are a deep brown.
Final Steps: Straining, Cooling, and Packaging Your Beef Stock
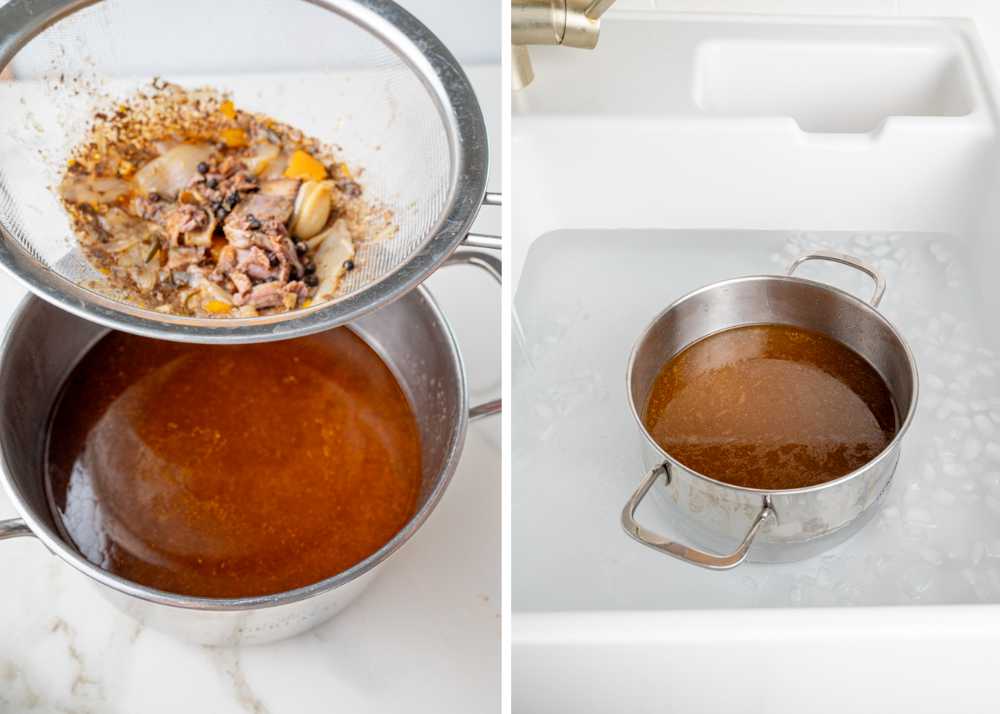
Strain the stock: Once done, strain the liquid and discard all the vegetables and bones. You can reserve the meat for other dishes. I recommend removing large pieces with kitchen tongs first, then straining the liquid through a fine-mesh strainer.
Cool the stock: To quickly cool a pot of stock, fill your sink with ice water (very cold water and ice cubes) and place the pot in the sink, ensuring the water level is below the rim of the pot. This way the whole pot cools really quickly.
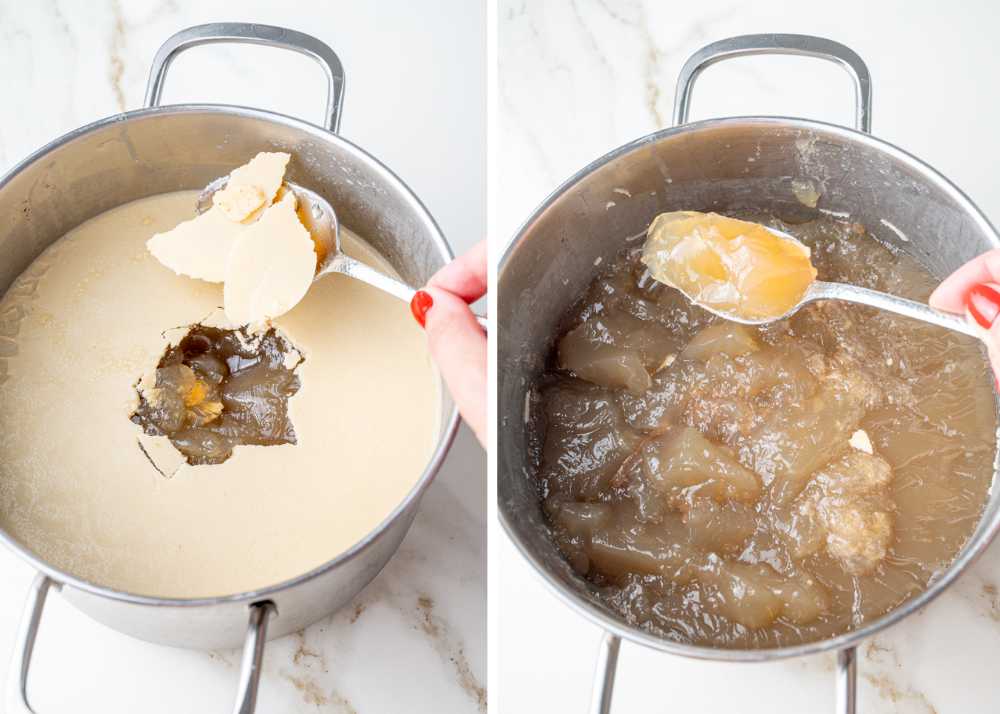
Remove the excess fat: Now we need to remove the fat from the stock so it’s not too greasy (optional). To do that, it’s best to place the pot with stock in the fridge overnight. The fat will solidify into a yellow layer on top, which you can scoop off with a spoon. You can discard the fat or save it for another recipe. The stock will turn into a jelly, which is completely normal.
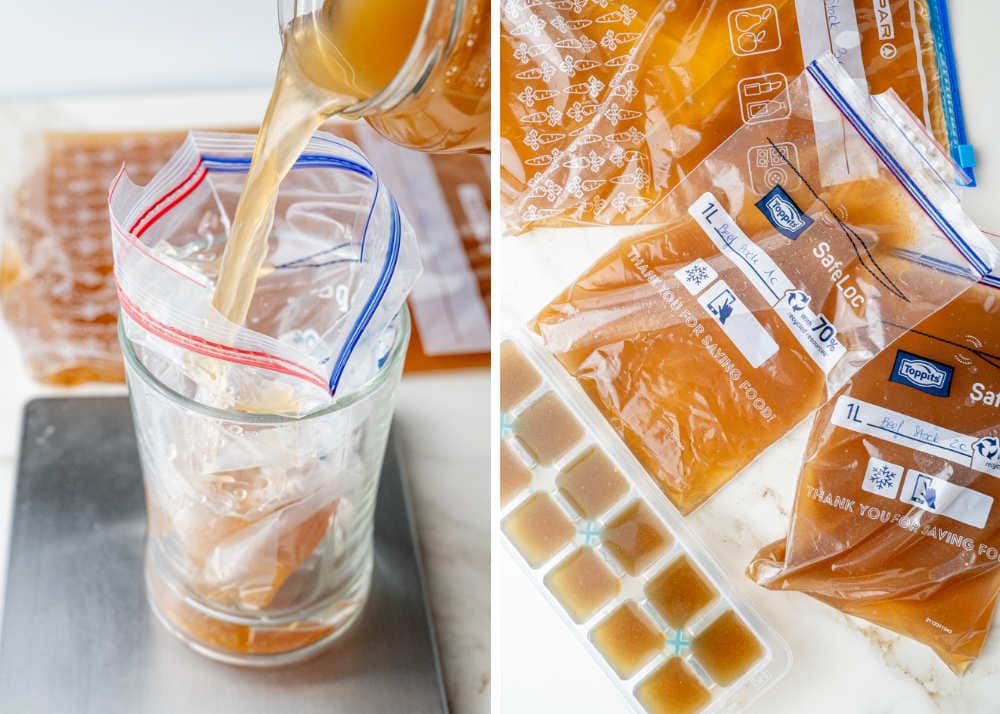
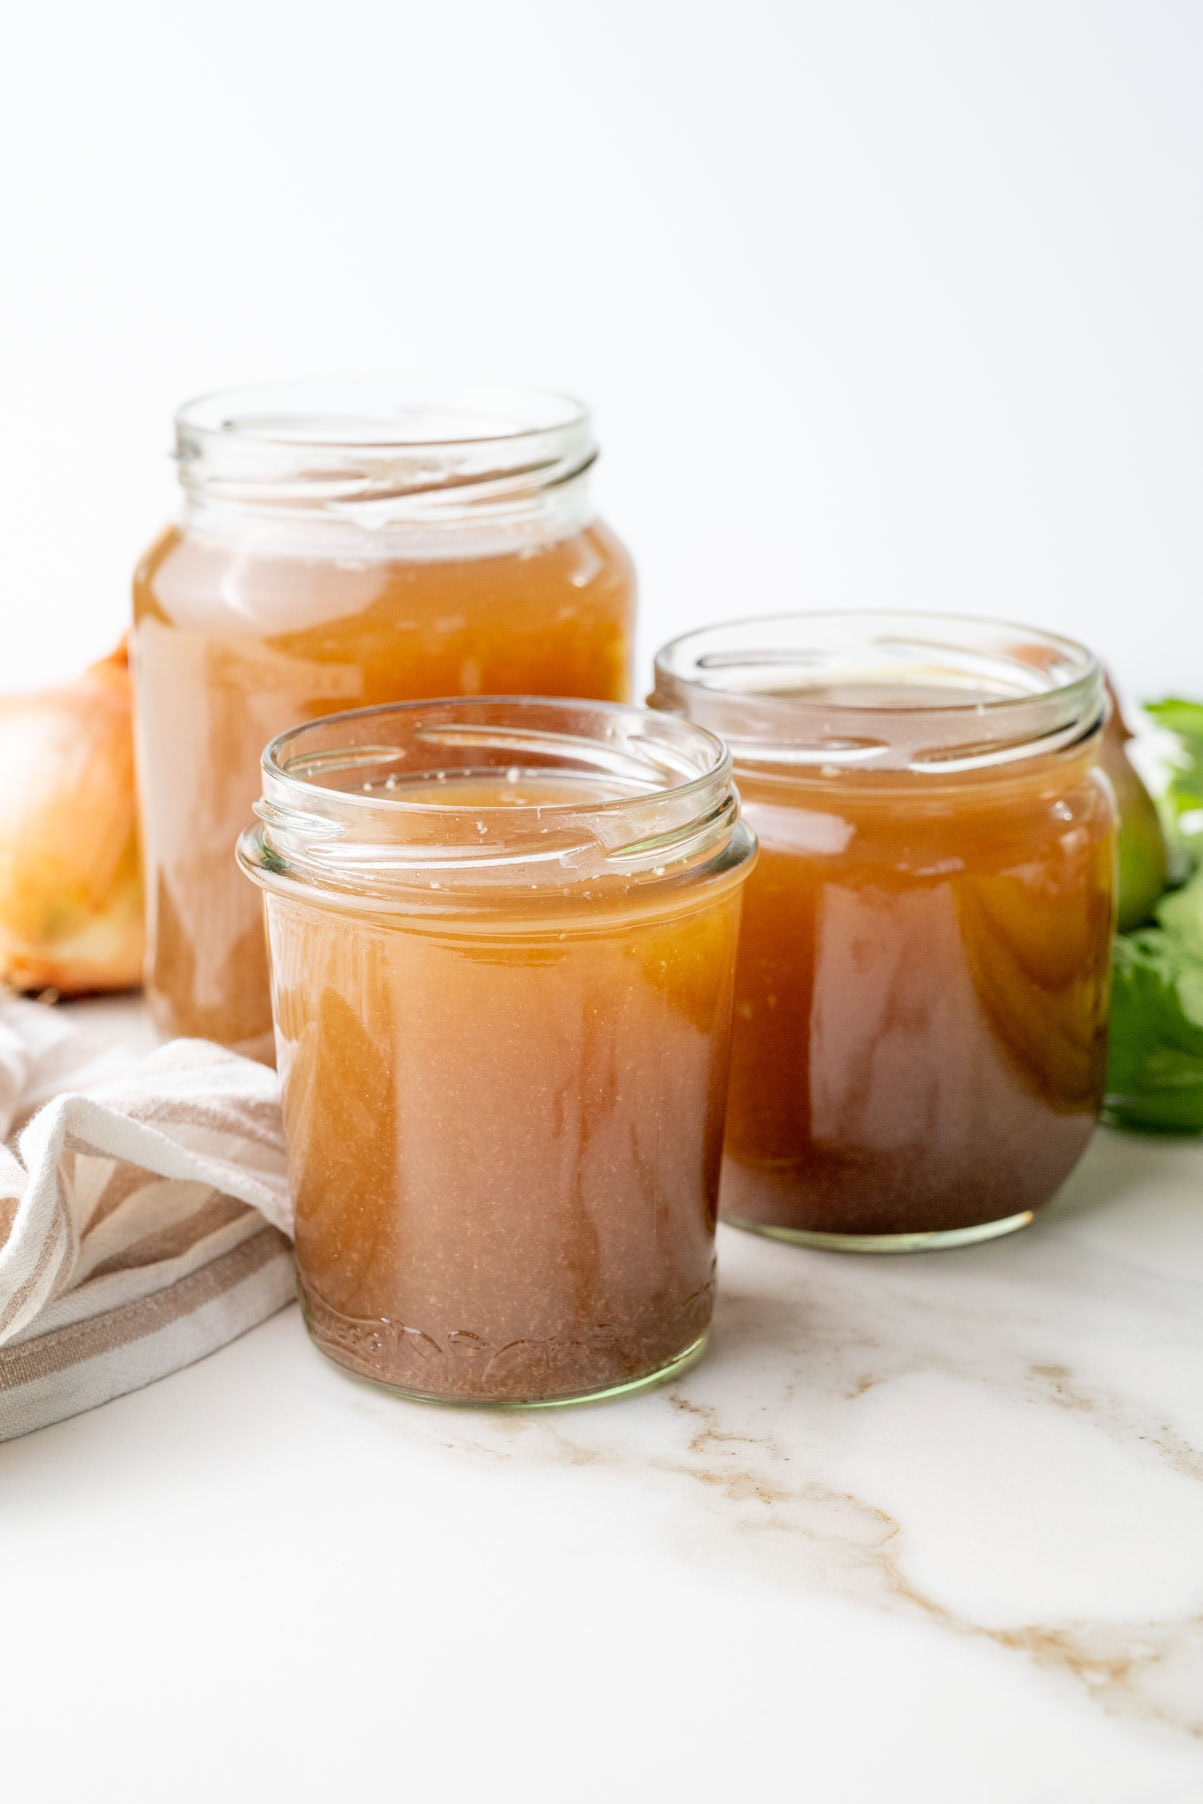
Storing for later: Now the stock is ready to use or you can freeze it for later. I find it helpful to freeze it flat in zip-lock bags in 1-cup and 2-cup portions. I also like to freeze some in an ice cube tray, this makes it easy to add small amounts to sauces.
To freeze the stock, you need to warm it until it returns to a liquid state. It is also possible to freeze and measure out the “jelly” (1 cup of jelly is almost the same as 1 cup of liquid), but the problem is that flavorful particles gather at the bottom of the pot when the stock is undisturbed and chilling. If you freeze the jelly as is, your stock won’t be uniformly flavored. Always chill your stock before freezing, then stir it well and place it in zip-lock bags or containers.
Beef Stock Uses


Did you make this recipe? RATE THE RECIPE or tell me in the COMMENTS how you liked it! You can also add a photo of your dish. It would make me very happy and will help other readers. Thank you!!
How to Make Beef Stock

Ingredients
- 2 pounds (900g) marrow bones
- 1 pound (450g) meaty bones
- 1 1/2 pounds (675g) beef stew meat
- 2 medium onions peeled and cut in half
- 2 ribs celery cut into 2-3 pieces
- 2 large carrots cut in half
- 2 cloves garlic
- a couple of twigs fresh herbs such as parsley thyme, and rosemary
- 2 bay leaves
- 20 whole black peppercorns
- 1 tablespoon tomato paste
- 3 pieces of dried mushrooms
- parmesan rind optional
- 2 anchovy fillets optional, won’t taste fishy!
- 1 tablespoon apple cider vinegar
- 2 teaspoons salt
- 12 cups (3L) water
Would you like to save this?
Instructions
- Add all the ingredients into a very large pot, ensuring that the herbs, spices, and all the “small” ingredients are placed beneath the meat. This step is optional but helps make skimming the stock easier.
- Slowly bring the pot to a boil, then reduce the heat to the lowest setting—just enough to maintain a very gentle simmer. Avoid cooking over higher heat, as this will make the stock cloudy.
- As the stock comes to a boil, use a small sieve to skim off the foam or scum that collects on the surface (optional, but it will make the stock clearer, although it doesn’t affect the flavor).
- Simmer the stock for 6 hours or longer (a minimum of 3-4 hours will suffice, but the flavor improves with extended cooking).
- Do not add any more salt, it’s better to season the dish you’ll use the stock in later.
- Once done, strain the liquid and discard all the vegetables and bones. You can reserve the meat for other dishes. I recommend removing large pieces with kitchen tongs first, then straining the liquid through a fine-mesh strainer.
- To quickly cool a pot of stock, fill your sink with ice water (very cold water and ice cubes) and place the pot in the sink, ensuring the water level is below the rim of the pot. This way the whole pot cools really quickly.
- Now we need to remove the fat from the stock so it’s not too greasy (optional). To do that, it’s best to place the pot with stock in the fridge overnight. The fat will solidify into a yellow layer on top, which you can scoop off with a spoon. You can discard the fat or save it for another recipe. The stock will turn into a jelly, which is completely normal. See photos in the body of the post for a reference.
- Now the stock is ready to use or you can freeze it for later. I find it helpful to freeze it flat in zip-lock bags in 1-cup and 2-cup portions. I also like to freeze some in an ice cube tray, this makes it easy to add small amounts to sauces.
- To freeze the stock, you need to warm it until it returns to a liquid state. It is also possible to freeze and measure out the “jelly” (1 cup of jelly is almost the same as 1 cup of liquid), but the problem is that flavorful particles gather at the bottom of the pot when the stock is undisturbed and chilling. If you freeze the jelly as is, your stock won’t be uniformly flavored. Always chill your stock before freezing, then stir it well and place it in zip-lock bags or containers.
Notes
- Simmering the stock VS Roasting+Simmering:
There are two common methods for making beef stock: simmering the ingredients directly in cold water (as described above) or roasting the bones, meat, and vegetables first (this method is written here below). - I tested both methods side by side and found the flavor difference to be minimal. While the roasted stock had a slightly sweeter, more caramelized taste, the difference wasn’t significant enough to justify the extra step of roasting. Simmering the ingredients directly in the pot produced a rich, flavorful stock with less effort and hands-on time (you still need to simmer it for multiple hours). You may try both methods to find out what works better for you.
- Here are the instructions, if you want to try the roast+simmer method:
- Place all the meat, bones, and vegetables on a large baking sheet and roast at 400°F (200°C) for 30 minutes. Then flip the meat and bones to the other side and continue roasting for an additional 20 minutes, or until they are well browned.
- Place all the meat, bones, and vegetables in a very large pot. Pour some hot water over the baking sheet and use a spatula to scrape up all the browned bits. Add this liquid to the pot.
- Add water and all the other ingredients to the pot and cook as described above.
- What you could also do: Instead of roasting the meat and bones, you could also brown them directly in the pot you’ll use for cooking your stock. Simply heat some oil over high heat and brown the meat and bones on both sides until they are a deep brown.
No Comments